
Most homeowners pay between $50 and $400 for a concrete patio permit, though that range can stretch to $1,000 or more in high-cost cities or when your project triggers additional reviews like grading, retaining walls, or stormwater management. A plain slab-on-grade patio in many municipalities costs as little as $50 to $100 in permit fees. An attached patio cover, a patio with a retaining wall, or a larger pour in a city that uses valuation-based fee schedules can push that number to $500 to $1,500 once plan review and inspection fees are added in. Before you budget your project, you need to know which permit types apply, what your city charges, and whether your specific patio design crosses any thresholds that trigger extra requirements.
Concrete Patio Permit Cost: Typical Fees, Tips & Timeline Guide

Felix Carver
6 Aug 2026
How permit fees vary by region and city
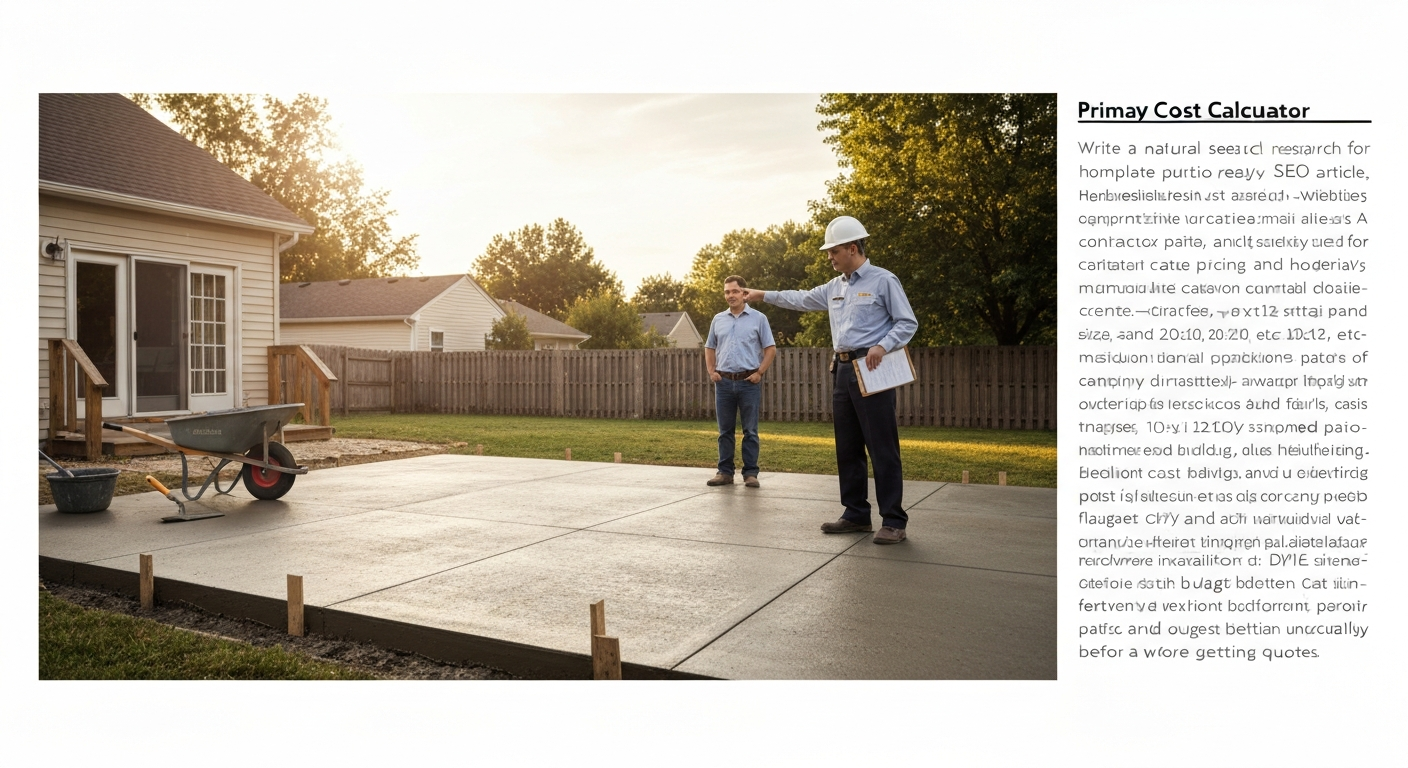
Permit costs for a concrete patio are not standardized across the U.S. Every municipality sets its own fee schedule, and the methodology varies widely. Some cities charge a simple flat fee for a paving or slab permit. Others calculate fees based on the estimated construction valuation of your project. A few use a per-square-foot formula. This means the same 400-square-foot patio could cost $94 in permit fees in Houston, roughly $250 in Chicago, or upward of $800 to $1,000 in Seattle (if a covered or attached element is involved). Rural and suburban jurisdictions with lower demand and smaller planning departments often land on the low end of that range.
High-cost coastal cities like Los Angeles and Seattle tend to have the steepest permit fees because they use valuation-based schedules, require plan review for more project types, and may layer on stormwater or environmental review fees. Mid-size Sun Belt cities like Houston and Phoenix tend to be more straightforward and cheaper. Small towns and rural counties sometimes charge less than $50 for a simple residential slab permit, and a few jurisdictions do not require a building permit for an on-grade concrete patio at all, as is the case in Seattle for basic slabs on grade.
Which permit types might apply to your patio
A concrete patio is not always just one permit. Depending on your design, site conditions, and local code, several different permit categories can come into play. Understanding which ones apply to your project upfront prevents surprise fees and delays mid-build.
- Building permit: The most common requirement for an attached patio, patio cover, or any structure built on footings. An open slab on grade is often exempt, but any overhead structure, enclosed space, or footings that extend below grade typically require a building permit.
- Paving or slab permit: Some cities (Houston is a clear example) issue a separate 'paving permit' for private-property concrete work rather than a standard building permit. Houston charges $94 for the first 1,000 square feet of paved area, then $3.36 per additional 1,000 square feet.
- Grading permit: Required when you move significant amounts of soil. If your patio installation requires cutting into a slope or filling to create a level surface, you may need a grading permit even if no building permit is required for the slab itself.
- Retaining wall permit: Almost universally required when a retaining wall exceeds 4 feet in exposed height (measured from the bottom of the footing to the top of the wall). Seattle, Denver, Los Angeles, and most other jurisdictions use the 4-foot threshold; above that, engineered and stamped plans are typically required, adding engineering costs on top of the permit fee.
- Electrical permit: Required if your patio includes in-slab conduit for outdoor lighting, receptacles, or a hot tub hookup. Electrical work tied to the patio is typically permitted and inspected separately from the slab itself.
- Plumbing permit: Needed if you are running a gas line to a built-in grill or fire pit, or if the project involves any drainage connection or outdoor water supply. In Seattle, for example, a separate side-sewer permit is required for any connection behind a retaining wall.
- Stormwater or drainage review: Adding a large impervious concrete surface can trigger stormwater management requirements. EPA guidance and many local MS4 programs use a threshold of roughly 2,500 to 5,000 square feet of new or replaced impervious surface to trigger post-construction stormwater controls. Seattle's code references bands starting around 2,000 square feet.
- Site plan or landscape permit: A handful of municipalities and HOA-governed developments require a site plan review or landscape permit for any significant hardscape addition, particularly in hillside or environmentally sensitive zones.
Thresholds that trigger a permit in the first place
Many homeowners are surprised to find that a basic concrete slab patio does not require a building permit in some cities. Seattle, for instance, explicitly exempts patios and concrete slabs on grade from building permits, while decks and patio covers still require them. Seattle's Stormwater/Drainage code can still impose on-site stormwater management for new or replaced impervious surfaces, with the city's Stormwater Code, Minimum Requirements (Title 22) commonly using thresholds in the 2,000–5,000 sq ft range that trigger additional requirements blank" rel="noopener noreferrer">Seattle Municipal Code — Stormwater Code / Minimum Requirements (Title 22). But there are several common triggers that flip a no-permit project into a permit-required one.
- Attachment to the house: A freestanding slab is often exempt; a slab attached to the foundation or supporting a covered structure is typically not.
- Overhead structure: Any roof, pergola with a solid cover, or enclosed walls above the slab almost always requires a building permit regardless of slab size.
- Retaining walls over 4 feet: This is the most consistent threshold across U.S. jurisdictions. Denver, Seattle, and Los Angeles all require building permits and engineered plans for walls over 4 feet of exposed height.
- Square footage: Some municipalities set an area cutoff (commonly 200 to 500 square feet) below which a simple slab is exempt. Others have no size exemption at all.
- Impervious surface limits: If your cumulative lot coverage of hard surfaces (patio plus driveway plus walkways) exceeds your zoning or stormwater limit, your project triggers additional review. Thresholds in many cities start around 2,500 square feet of total new impervious area.
- Hillside or sensitive sites: Properties in landslide-prone zones, floodplains, or coastal areas face additional review layers regardless of project size.
- Setbacks and easements: Even a permit-exempt slab cannot legally encroach on setbacks or utility easements. Violating these can require removal.
What goes into the total permit cost
The number your city quotes as the 'permit fee' is often just one line item. The total cost you actually pay can include several components stacked together, and missing any one of them can throw off your budget.
- Application fee: A flat intake charge just to submit the permit application. Typically $25 to $100, though some cities roll this into the overall fee.
- Plan review fee: Charged when a plans examiner reviews your submitted drawings. Often calculated as a percentage of the permit fee or as a separate flat charge. Cities using valuation-based schedules typically charge plan review at 65 to 80 percent of the permit fee for residential projects.
- Inspection fees: Many municipalities charge separately for each required inspection visit. If your slab requires three inspections (subbase, reinforcement, and final), each visit may carry a fee of $50 to $150.
- Impact fees or utility fees: Less common for a patio than for new construction, but some jurisdictions charge stormwater impact fees when you add significant impervious surface. These can run $0.10 to $1.00 per square foot of new impervious area in cities with active stormwater programs.
- Engineering fees: Not technically a permit fee, but if your project requires a stamped engineered plan (common for retaining walls over 4 feet), expect to pay $500 to $2,500 or more for a licensed structural engineer's review and stamp, on top of the permit fee itself.
- Bond or insurance requirements: Some jurisdictions require contractors to post a surety bond or show proof of liability insurance before a permit is issued. This is usually a contractor-side cost that gets built into their bid, but it affects your total project cost.
- Re-inspection fees: If work fails an inspection, a re-inspection fee (commonly $75 to $150) is charged for each follow-up visit.
Sample permit costs by patio size and market
The table below shows estimated permit fee ranges for three common patio sizes across low-, mid-, and high-cost U.S. markets. These estimates reflect the permit fee itself (application plus plan review plus inspections) for a basic open slab with no overhead structure, no retaining wall, and no electrical or plumbing work. Projects with those additions will cost more.
| Patio Size | Low-Cost Market (e.g., Houston, TX) | Mid-Cost Market (e.g., Chicago, IL) | High-Cost Market (e.g., Seattle, WA / Los Angeles, CA) |
|---|---|---|---|
| 10x10 (100 sq ft) | $50–$100 | $100–$175 | $200–$400 |
| 12x12 (144 sq ft) | $50–$100 | $100–$200 | $250–$500 |
| 20x20 (400 sq ft) | $94–$150 | $150–$300 | $400–$1,000+ |
Houston's paving permit formula makes it one of the most transparent: $94 flat for any paved area up to 1,000 square feet. A 100-square-foot patio and a 400-square-foot patio cost the same to permit there. Chicago uses a fee calculator through its Department of Buildings; third-party permit cost summaries put a basic residential patio building permit at around $250. Seattle's SDCI fees are higher and valuation-based, with a typical deck or patio permit estimate landing around $894 based on SDCI fee tables. Los Angeles fees follow LADBS valuation schedules and can exceed $1,000 once plan check fees are included for larger pours or hillside sites.
If your patio includes a retaining wall over 4 feet, add engineering costs ($500 to $2,500 for stamped plans) and an additional permit fee for the retaining wall itself, commonly $150 to $500 on top of the slab permit. An electrical permit for outdoor circuits typically adds $75 to $200 in most markets.
How the permit application process actually works
The process is more straightforward than most homeowners expect, especially for a simple slab. Here is a step-by-step picture of what to expect from most U.S. building departments.
- Confirm whether a permit is required: Call or check your municipality's building department website before assuming anything. Many cities publish permit-required vs. exempt project lists. Seattle's SDCI website, for example, lists patios on grade as generally exempt and decks/covers as required.
- Gather required documents: For a simple slab, you typically need a site plan (a bird's-eye sketch of your lot showing the patio location, dimensions, setbacks from property lines and the house, and drainage direction), a construction plan showing slab thickness, reinforcement layout, and any footings, and your property survey or plat map.
- Submit the application: Most mid-size and large cities now accept online submissions through portals like DOB NOW (NYC), LADBS e-Permit, or Chicago's E-Plan system. Smaller jurisdictions may still require over-the-counter submissions. Pay the application fee at this step.
- Plan review: A plans examiner reviews your documents for code compliance. For a simple open slab, this is often an over-the-counter or same-day review in smaller cities. Complex projects, hillside sites, or valuation-based reviews in large cities can take two to six weeks.
- Permit issuance and fee payment: Once approved, you pay the remaining permit fee balance and receive your permit. The permit must be posted visibly on site during construction.
- Schedule and pass required inspections: Contact the building department to schedule each inspection at the appropriate construction stage. Do not proceed past an inspection point without the inspector's sign-off, or you may be required to uncover or demolish completed work.
- Final inspection and permit close-out: Once all inspections are passed, the permit is closed. Keep copies of your approved permit and inspection records — you will need them if you sell the house.
What documents you typically need
- Site plan showing patio dimensions, setbacks, and orientation on the lot
- Construction detail showing slab thickness (typically 4 inches for residential), subbase depth, reinforcement (wire mesh or rebar), and vapor barrier if required
- Drainage plan or grading notes showing how water will be directed away from the structure
- Engineered stamped plans (required for retaining walls over 4 feet in most jurisdictions)
- Contractor license number and proof of insurance if a contractor is pulling the permit
- Homeowner authorization form if the homeowner is acting as their own general contractor
How long the permit process takes
Timeline is where permits most directly affect your project schedule. A permit delay does not just push back your start date; it can push back your contractor's availability window, causing weeks of additional delay if they have booked other jobs.
| Phase | Typical Duration | What Affects It |
|---|---|---|
| Application preparation | 1–3 days | Whether plans are already drawn; complexity of the site |
| Plan review (simple slab) | 1–5 business days | City workload, over-the-counter vs. submitted review |
| Plan review (complex / valuation-based) | 2–6 weeks | Large cities, hillside sites, retaining walls, attached structures |
| Permit issuance after approval | Same day to 3 business days | Online vs. in-person pickup |
| Each required inspection | 1–3 business days to schedule | Inspector availability, city volume |
| Total calendar impact (simple patio) | 1–2 weeks | Mostly administrative; straightforward projects move quickly |
| Total calendar impact (complex project) | 4–10 weeks | Retaining walls, hillside sites, plan revisions, multiple permits |
Most concrete patios go through three to four inspections: a subbase or excavation inspection before the pour, a reinforcement inspection confirming rebar or mesh placement and any conduit in the slab, sometimes a concrete placement observation, and a final inspection for drainage and finish grade. Each inspection requires the contractor or homeowner to schedule a visit, be on site, and wait for the sign-off before proceeding. Budget at least three to five business days per inspection in busy jurisdictions.
How permits change your total project cost
The permit fee itself is rarely the biggest cost driver. What matters more is how permitting affects the rest of your budget. Licensed contractors who pull permits typically charge 10 to 20 percent more than unlicensed operators who skip permits, reflecting their overhead for licensing, insurance, bonding, and the time spent managing permit submittals. That premium is real, but it buys you recourse if work fails inspection and legal protection if something goes wrong. On a $3,500 patio job, that premium might add $350 to $700 to the total bid.
Required inspections can also add indirect costs. If a contractor has to wait for an inspection before pouring, a scheduled pour can be delayed by a day or more. On jobs with multiple subcontractors or tight schedules, that delay has a real dollar cost. Ask your contractor up front whether they have factored inspection scheduling time into the project timeline and price.
The real cost of skipping a permit
Homeowners sometimes skip permits to save time and money upfront. That calculation usually backfires. Most U.S. jurisdictions assess doubled or tripled permit fees for work performed without a required permit, on top of an investigation fee for the stop-work order or complaint that triggered the review. New York City's DOB, for instance, imposes civil penalties, mandatory stop-work orders, and legalization filings for unpermitted work, and OATH fines can run into the hundreds or thousands of dollars. After‑the‑fact / Work Without Permit consequences (summary referencing NYC DOB practices): many U.S. jurisdictions assess doubled or tripled fees, investigation fees, and civil penalties for unpermitted work, for example, NYC DOB issues civil penalties, mandatory stop‑work orders, and OATH fines that can run into the hundreds or thousands of dollars. Many other cities apply a similar doubling or tripling of the original fee as a penalty.
The bigger long-term risk is at resale. Buyers' home inspectors and lenders routinely check for open or missing permits, and an unpermitted patio can complicate or kill a sale. Title companies may require the seller to pull an after-the-fact permit and pass inspections before closing, which means potentially demolishing and rebuilding nonconforming work. An after-the-fact permit process (sometimes called a legalization permit) typically costs two to three times what the original permit would have cost, plus any remediation work required to bring the construction up to current code.
How related patio work affects permitting and budget
Permits are often the first domino. The work you do before, during, and after pouring the slab all interacts with the permit process, and each phase carries its own cost implications worth tracking in your overall budget. If you plan to finish the slab with paint or a coating, see our guide on how much does it cost to paint concrete patio for typical material and labor prices.
Demolishing an existing patio before pouring new concrete is a common first step, and it is usually permit-exempt for residential demo of a slab. However, if the demo involves a retaining wall, an attached structure, or connections to utilities, permits may be required. Demo costs run $500 to $2,500 for most residential patios depending on size and access. Pouring the new slab is where the bulk of the permit requirement lives: the building or paving permit covers the new concrete work and triggers the inspection sequence described above. Once the slab is in, surface treatments like epoxy coating, concrete paint, or staining are generally cosmetic and do not require separate permits in most jurisdictions. Those finishing steps are worth planning in your budget from the start, though, since they add $1 to $7 per square foot depending on the method chosen. For costs on staining the finished slab, see how much to stain concrete patio.
DIY vs. hiring a licensed contractor: who handles the permit
You have two realistic options for permit management: pull it yourself as the homeowner, or hire a licensed contractor who handles it for you.
| Factor | DIY Homeowner Permit | Licensed Contractor Handles Permit |
|---|---|---|
| Who submits | Homeowner directly | Contractor submits under their license |
| Permit fee paid by | Homeowner (direct to city) | Contractor (typically billed back in the project cost) |
| Plan preparation | Homeowner draws plans or hires a drafter ($150–$500) | Contractor usually includes basic plans |
| Liability if work fails inspection | Homeowner is solely responsible | Contractor must remedy at their expense |
| Typical added cost | Your time plus plan prep costs | 10–20% premium on overall project bid |
| Best for | Simple slabs, confident DIYers, budget-conscious projects | Complex projects, attached structures, retaining walls |
Most homeowners who are comfortable pouring their own concrete can also pull their own permit without a contractor. The process is the same: submit a site plan, pay the fee, schedule inspections. Where it gets tricky is on projects with retaining walls over 4 feet (engineered plans required), electrical work (requires a licensed electrician in most states), or any connection to the sewer or gas system (requires licensed trade contractors). For those elements, hire licensed subcontractors who will pull their own permits.
Practical ways to keep permit costs down
- Bundle permits when possible: If your project needs a building permit for a covered patio and a separate electrical permit for outdoor lighting, submitting them at the same time saves re-review fees and scheduling overhead.
- Use pre-approved or standard plans: Some municipalities offer pre-approved standard plan sets for common patio and deck configurations. Using these eliminates individual plan review fees and speeds up approval times significantly.
- Avoid the retaining wall threshold: Designing your grading so that walls stay below 4 feet of exposed height can eliminate both the retaining wall permit and the engineering fee. This is one of the highest-ROI design decisions you can make during planning.
- Stay under impervious surface thresholds: If your total paved area is close to your municipality's stormwater trigger (often 2,500 to 5,000 square feet), adjusting patio size or using permeable pavers in portions of the project can avoid triggering post-construction stormwater controls.
- Ask about over-the-counter review: Many cities offer same-day or next-business-day review for simple residential projects if you submit directly over the counter rather than through the online queue. This saves weeks of wait time at no extra cost.
- Negotiate permit management in contractor bids: When getting contractor quotes, ask whether the permit fee is a pass-through at cost or marked up. Some contractors mark up permit fees by 10 to 15 percent as an administrative handling fee. Request the permit fee as a documented line item so you can compare bids fairly.
- Verify exemptions before budgeting for a permit: Confirm with your building department whether your specific patio design is actually permit-required. Paying for a permit you did not need wastes money; skipping one you did need costs far more.
Budgeting checklist before you get contractor quotes
Before you call a single contractor, work through this checklist. It takes about an hour and will save you from mispriced bids, surprise fees, and permit delays after the project starts.
- Check your city's building department website or call to confirm whether your patio design requires a permit (and which type).
- Measure your planned patio dimensions and calculate square footage. Note whether it will be attached to the house or freestanding.
- Check whether any portion requires a retaining wall and estimate the exposed wall height. If over 4 feet, budget for engineering ($500–$2,500) and a separate retaining wall permit.
- Look up your city's permit fee schedule or use their online calculator. Identify all applicable fees: application, plan review, inspections, and any stormwater or impact fees.
- Add the total permit fee estimate as a line item in your project budget. For most residential patios, budget $100–$500 for permits; for complex projects in high-cost cities, budget $500–$1,500.
- Decide whether to DIY the permit process or have a contractor handle it. If contractor-managed, ask each bidder to itemize permit fees separately in their quote.
- Factor in inspection scheduling time when setting your project timeline. Add at least two weeks to your estimated start-to-finish duration to account for permit approval and required inspections.
- Get at least three contractor quotes and confirm each bid includes permit management, all required inspections, and compliant construction to current code.
- If demolition of an existing patio is required first, price that separately and confirm whether it requires its own permit in your jurisdiction.
- Plan your surface finish (bare concrete, epoxy, stain, or paint) before the pour, since some finishes affect surface prep requirements and the cost-per-square-foot math changes significantly depending on which route you choose.
Permit costs are a real but manageable part of a concrete patio budget. For a breakdown of material and labor costs and to estimate volume and concrete pricing, see how much to pour patio. On a typical $3,000 to $6,000 installation for a mid-size patio, the permit fee itself is usually less than 5 to 10 percent of the total. The bigger impact is on your timeline and contractor selection. Getting the permit process right from day one protects your investment, keeps your project legal at resale, and ensures the finished slab meets the code requirements that protect it from drainage failures, structural problems, and liability.
FAQ
How much does a concrete patio permit typically cost for a homeowner?
Typical ranges: $0–$100 for very small, exempt poured slabs (many jurisdictions); $100–$500 for a simple flat permit in small/medium cities; $500–$1,500 for building permits in larger cities when plan review is required; $800–$2,500+ in high‑cost cities or when valuation‑based fees apply. Example city patterns: Seattle deck/patio examples ≈ $800–$1,000; Chicago examples show modest flat permits around $200–$400; Houston uses an area formula (e.g., $94 for first 1,000 sq ft). Exact cost depends on local fee schedules and whether additional reviews or impact fees apply.
What permit types may apply to a residential concrete patio project?
Common permit types: building/structural permits (for covered or attached patios, steps, or decks); paving/slab permits (for simple slabs on grade in some cities); grading/earthwork permits (if excavation or slope work occurs); retaining wall permits (typically required if exposed height > 4 ft); electrical or plumbing permits (if adding lighting, outlets, or gas lines); stormwater/site plan or landscape permits (if new/replaced impervious area triggers on‑site controls). A project can require multiple permits.
What size or attachment conditions usually trigger a permit?
Typical triggers: attachment to the house (roof/cover, connected structural framing) almost always requires a building permit; covered patios or patios with footings/piers normally need permits; retaining walls with exposed height over ~4 ft usually require permits and engineered plans in many cities (Seattle, Denver, LA examples). Many stormwater or post‑construction controls trigger at larger impervious thresholds (common municipal triggers are 2,000–5,000 sq ft or often 2,500 sq ft). Small, simple slabs on grade sometimes are exempt—check local rules.
Can you break down common permit fee components?
Typical fee components: application fee (flat administrative charge); plan review fee (flat or % of valuation); inspection fees (per inspection or included in permit); impact or mitigation fees (stormwater, sewer, park, traffic in some jurisdictions); investigation/penalty fees (for after‑the‑fact work). Example cost split: application $25–$150; plan review $50–$700+; inspections $50–$200 total; impact fees highly variable (hundreds to several thousand depending on jurisdiction).
What are sample permit cost estimates for common patio sizes (10×10, 12×12, 20×20)?
These are illustrative nationwide ranges; local fees vary: 10×10 (100 sq ft): often exempt or $0–$250 if small slab; 12×12 (144 sq ft): $0–$400 typical for simple slab; 20×20 (400 sq ft): $50–$800 for a paving/slab permit in smaller cities, $300–$1,500+ in larger cities with valuation or plan review. If the patio is covered or attached, expect higher building permit fees tied to valuation (commonly $500–$2,000+). Check your city calculator for precise values.
How do jurisdictions calculate permit fees (methodology)?
Two common methods: flat/fixed fees for specific permit categories (paving, small decks) and valuation‑based formulas where fee = base + (rate × project valuation) or a % for plan review. Some area‑based fees exist for paving/slab permits (e.g., Houston’s per‑1,000 sq ft increments). Large cities often use valuation calculators; smaller jurisdictions often use fixed fees.
Next Articles
How Much Does It Cost to Epoxy a Patio? Installed Pricing
Installed cost of epoxy patio floors, per sq ft ranges, prep and epoxy system factors, and example budgets for common si
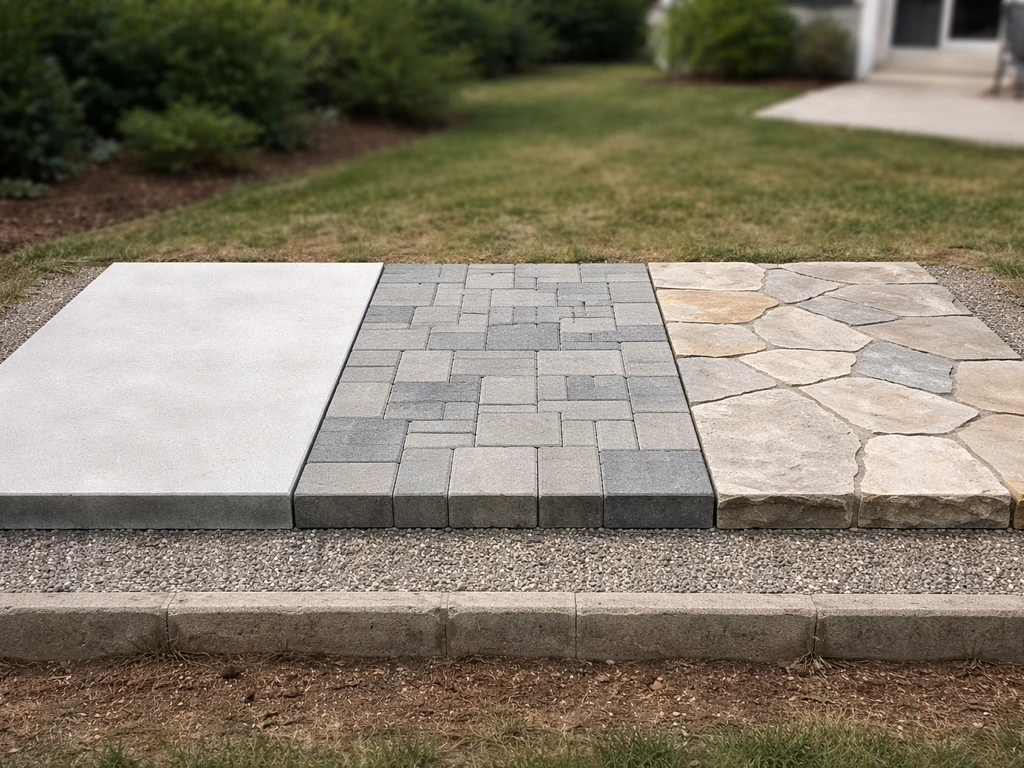
How Much Should I Expect to Pay for a Patio
Patio cost guide with real price ranges by size and material, full line-item budget, DIY vs install, and quote checklist
How Much Patio Around Pool: Cost, Size, and Budget Guide
Learn how much patio around a pool costs and how to size square feet, materials, extras, and get real bid line items.