A 20x30 concrete patio (600 square feet) will typically run between $3,600 and $12,000 installed for a standard broom-finish slab, which works out to roughly $6 to $20 per square foot. Most homeowners land somewhere in the $7,200 to $9,600 range for a straightforward job with proper prep, rebar, and a basic finish. If you upgrade to stamped or colored concrete, expect to pay $12 to $30 per square foot, pushing the total to $7,200 on the low end and $18,000 or more for a heavily decorative finish with multiple colors or patterns.
How Much Does a 20x30 Concrete Patio Cost? 2026 Guide

Felix Carver
19 May 2026
What you're actually paying for: the full cost breakdown
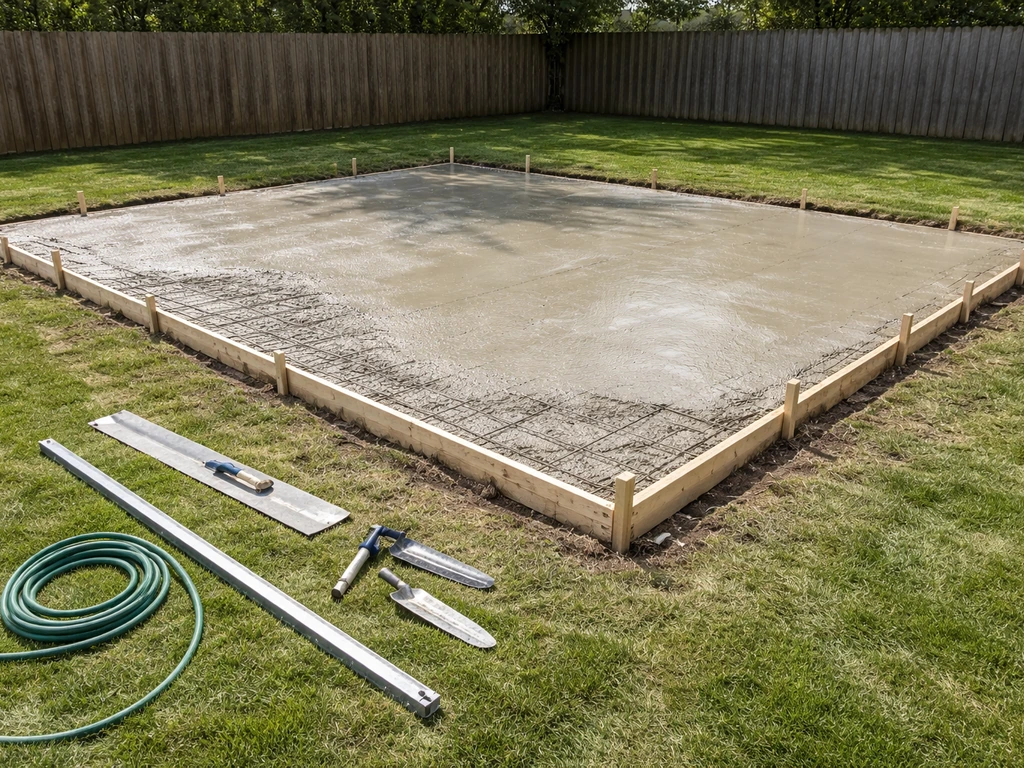
Contractors rarely quote "concrete only." A realistic installed bid for a 600-square-foot patio covers a lot of line items that homeowners often don't see coming. Here's what typically goes into the number:
| Line Item | Typical Cost (600 sq ft job) | Notes |
|---|---|---|
| Site prep and grading | $300 – $900 | More if the yard is sloped or needs significant leveling |
| Excavation and hauling | $200 – $600 | Depth of dig depends on your region's frost depth and slab thickness |
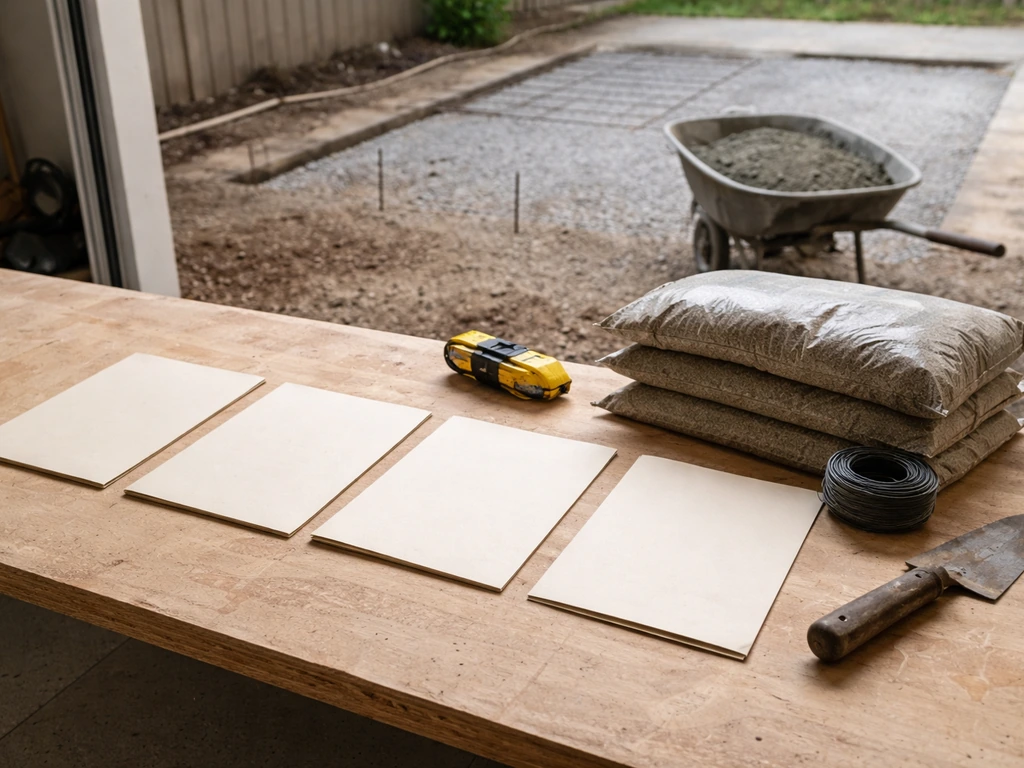
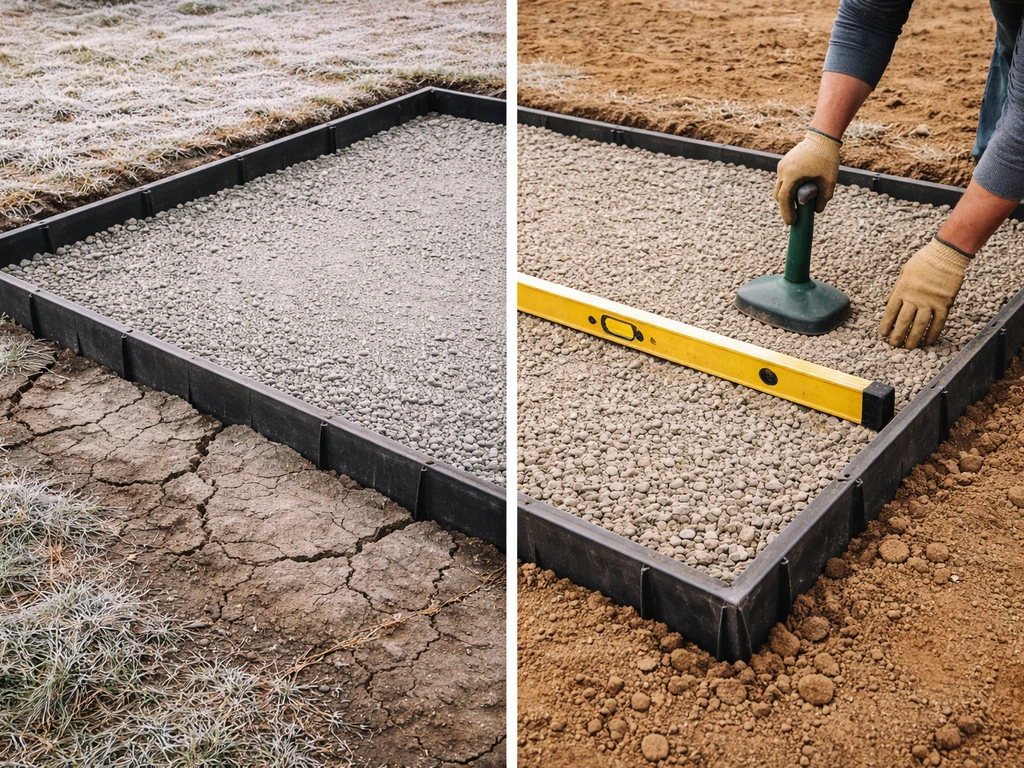
| Gravel sub-base (4–6 inches) | $300 – $700 | Crushed stone base is non-negotiable for drainage and slab life |
| Forms and edging | $150 – $400 | Wood or metal forms set the slab shape; removed or left in place |
| Vapor barrier / poly sheeting | $50 – $150 | Helps control moisture migration under the slab |
| Reinforcement (rebar or wire mesh) | $200 – $600 | #3 rebar on 18-inch grid is a solid standard; mesh is cheaper but less effective |
| Concrete material (ready-mix) | $900 – $1,800 | Roughly 7–8 cubic yards at $120–$180/yard delivered |
| Pouring and finishing labor | $1,200 – $3,600 | This is the biggest variable — broom finish is cheapest, stamped costs more |
| Control joints (saw-cut or tooled) | $100 – $250 | Cut every 8–10 feet to manage cracking |
| Sealing (optional but recommended) | $300 – $900 | At $0.50–$1.50/sq ft for a basic penetrating sealer; decorative sealers run $3–$5/sq ft |
| Cleanup and debris removal | $100 – $300 | Often included in labor, but confirm this upfront |
Adding all of that up, a basic broom-finish job on a flat lot with good soil could come in around $3,800 to $6,500. A more typical job with proper reinforcement, a quality sub-base, and sealing runs $7,000 to $10,000. Stamped or colored work with a decorative sealer can easily reach $12,000 to $18,000 for 600 square feet.
Price per square foot: what moves the number up or down
The installed price per square foot is the easiest way to sanity-check a quote. Here's what to expect based on finish type, and what actually drives price in each tier:
| Finish Type | Price Per Sq Ft | 600 Sq Ft Total Estimate |
|---|---|---|
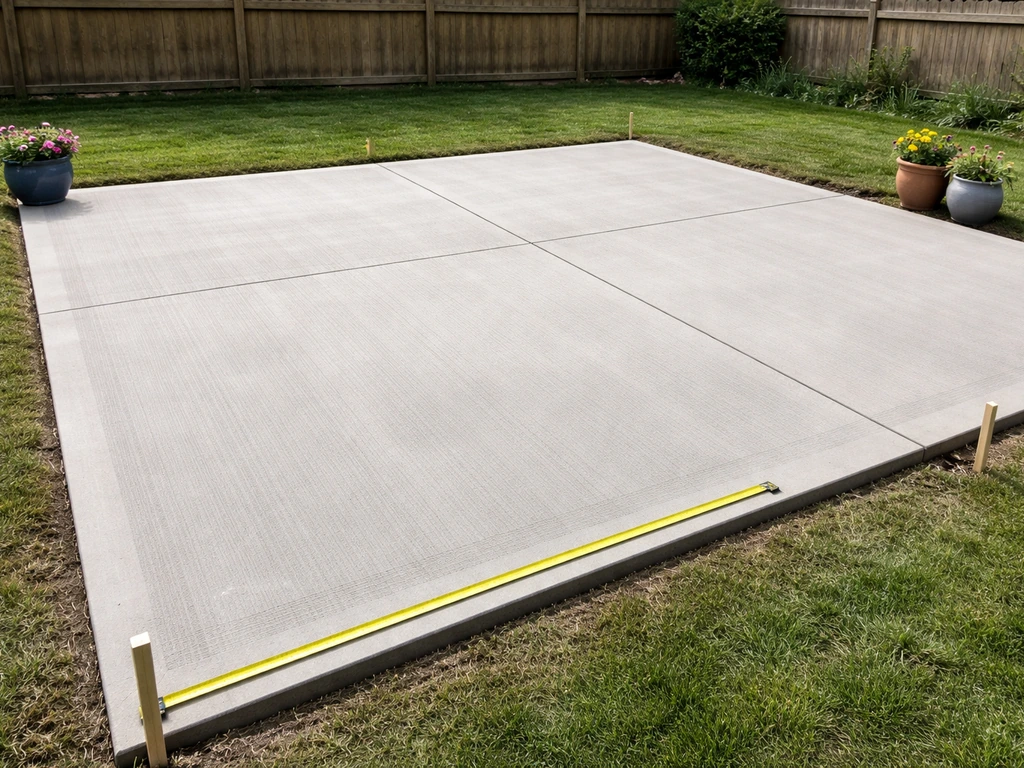
| Basic broom finish | $6 – $10 | $3,600 – $6,000 |
| Exposed aggregate | $8 – $14 | $4,800 – $8,400 |
| Colored/stained concrete | $10 – $17 | $6,000 – $10,200 |
| Stamped concrete (single pattern) | $12 – $20 | $7,200 – $12,000 |
| Stamped + multiple colors/borders | $18 – $30 | $10,800 – $18,000 |
Beyond the finish, a few other factors push cost per square foot higher or lower. Slab thickness is a big one: a standard 4-inch residential slab is the minimum recommended, but if you're parking on it or have heavy outdoor furniture and foot traffic, going to 5 or 6 inches adds about $0. EstimateConcrete.
coms 2026 patio guide similarly highlights keeping a minimum 4-inch slab thickness and using proper reinforcement and control joints every 8 to 10 feet as key life-cycle factors a standard 4-inch residential slab is the minimum recommended. 50 to $1. 50 per square foot.
Rebar versus wire mesh matters too: rebar costs more but does a better job of holding cracks together if the slab does move. Access to the site affects labor time significantly, and minimum job charges from contractors can inflate the per-square-foot cost on smaller pours.
Upgrades worth knowing about before you commit
Stamped and colored concrete
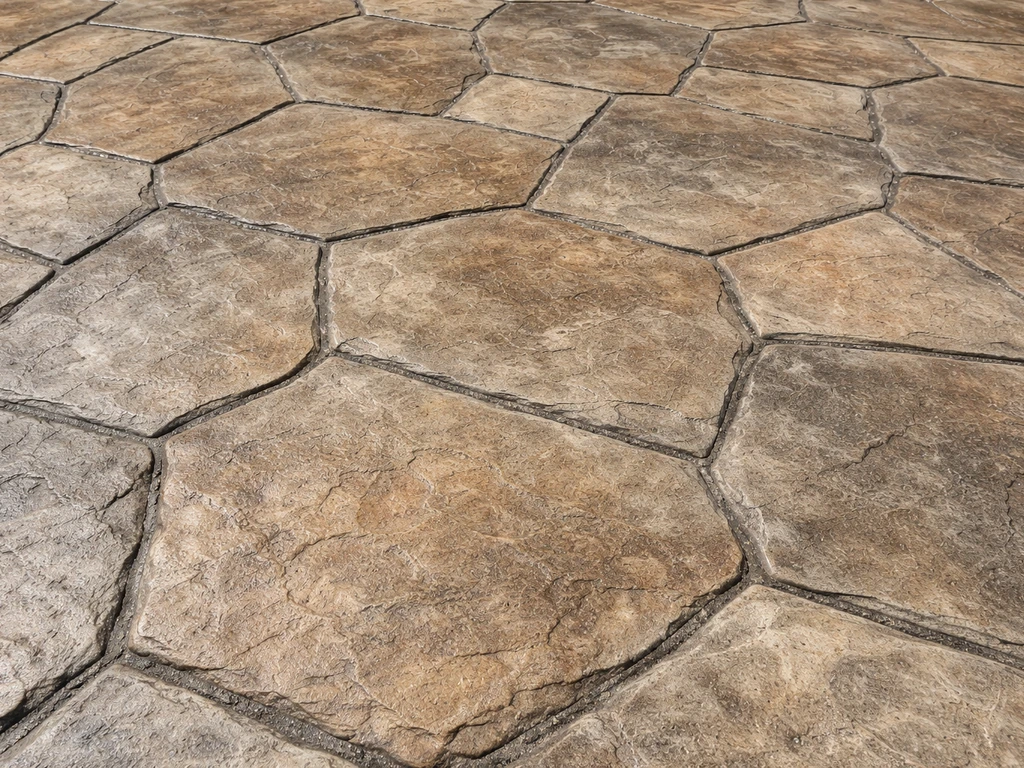
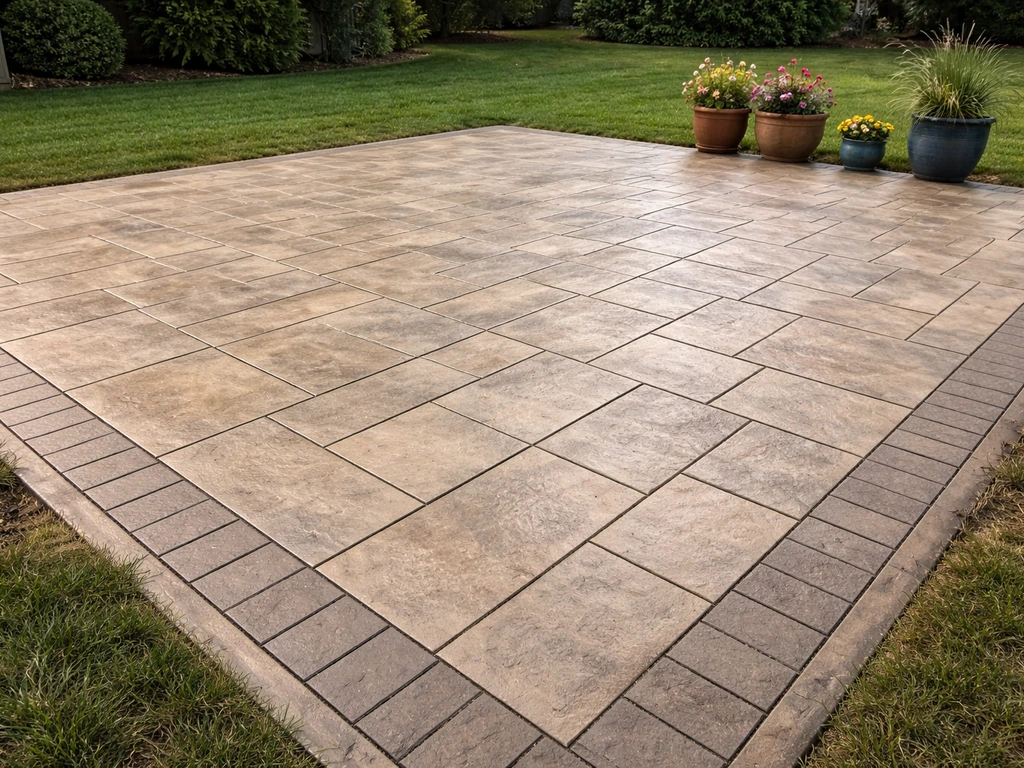
Stamped concrete uses rubber mats pressed into freshly poured concrete to mimic stone, slate, brick, or wood. It's a genuinely attractive finish and costs significantly less than real stone or pavers. The catch is that it requires more skilled labor, takes longer to pour, and needs a high-quality sealer to stay looking good. Plan on resealing every 2 to 3 years, which adds to the long-term cost. Colored concrete (integral color mixed in or a dry-shake hardener applied to the surface) adds $1 to $3 per square foot over plain concrete. Combining stamping with color and a border pattern is where you start seeing $20 to $30 per square foot totals.
Thickness and reinforcement
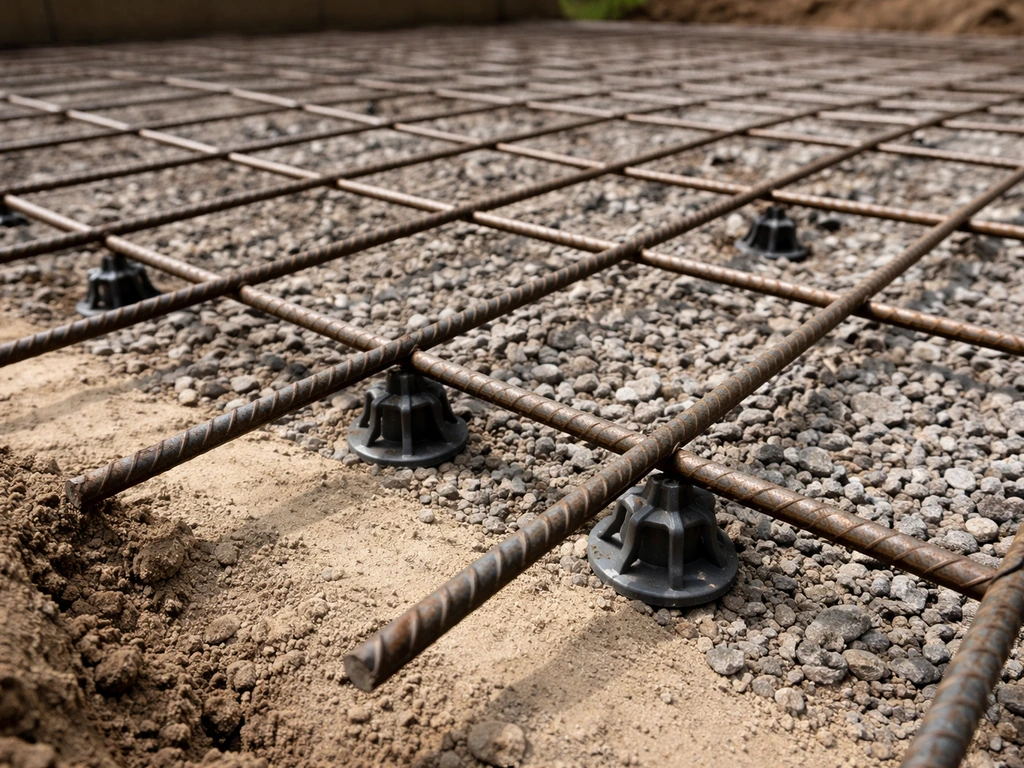
Four inches is the standard residential slab thickness. Most reputable contractors won't go below that. If your patio will see regular vehicle traffic or you're in a freeze-thaw climate with expansive soil, 5 inches is worth the extra cost. For reinforcement, #3 rebar on an 18-inch grid is the standard that quality contractors like Metal America Concrete include in their base specs. Wire mesh is cheaper (often $0.10 to $0.20 per square foot less) but doesn't hold cracks together as effectively once they form.
Control joints and edges
Control joints cut into the slab every 8 to 10 feet give the concrete a place to crack along a straight, hidden line rather than randomly across the surface. They're either tooled in while the concrete is fresh or saw-cut after it cures. Don't skip them. Decorative edges (rounded, beveled, or exposed aggregate borders) are a low-cost upgrade at $2 to $5 per linear foot that makes a plain slab look considerably more finished.
Regional pricing and site conditions that can swing your total
Where you live can easily shift your total by 20 to 40 percent in either direction from a national average. Labor markets drive most of that variation. A patio that costs $8,000 installed in the Midwest might run $11,000 to $13,000 in California or the Northeast, and $6,500 to $7,500 in parts of the South. Ready-mix concrete prices also vary by region and fluctuate with fuel and material costs, so a quote you received a year ago may not reflect current pricing.
Beyond geography, your specific site conditions matter a lot. Here are the scenarios that most commonly push a job over budget:
- Sloped yard: Significant grading can add $500 to $2,000+ to prep costs, and a sloped pour requires more forming work and careful drainage planning.
- Poor or expansive soil: If your contractor finds soft, clay-heavy, or waterlogged soil, they may need to dig deeper, add fill, or compact more aggressively. This can add $500 to $1,500.
- Removing an existing slab: Demo and hauling a 600-square-foot concrete slab typically costs $1,500 to $3,500 depending on slab thickness and access.
- Tight or limited access: If a concrete truck can't get close to the pour site, concrete has to be moved by wheelbarrow, which adds significant labor time and cost.
- Permits: Some municipalities require permits for slabs over a certain size or attached to the home's structure. Permit fees vary from $50 to $400+, and the process can add weeks.
- Adding steps or a walkway: Steps off the patio typically run $100 to $300 per step. A connecting walkway adds to square footage and may need its own permit.
DIY vs. hiring a contractor: honest trade-offs
A 600-square-foot pour is not a weekend DIY project unless you have real concrete experience. That said, let's look at what the numbers actually look like if you try to do it yourself versus hiring it out.
On a DIY pour at this size, you're typically ordering 7 to 8 cubic yards of ready-mix concrete delivered by truck. You'll need to have your forms set, sub-base compacted, and rebar in place before the truck arrives, because you're on the clock from the moment it pulls up. You'll also need a bull float, screed boards, trowels, and ideally a power trowel or at least a second pair of experienced hands. Renting equipment adds $200 to $500.
The concrete itself might run $1,200 to $1,500 delivered. Materials for forms, rebar, and base gravel could add another $600 to $900. So a rough DIY materials-only estimate lands around $2,200 to $3,500, versus a professionally installed job at $7,000 to $10,000 for the same broom-finish result. That gap is real.
But here's the honest part: if the pour goes wrong (cold joints, a slab that's out of level, surface issues from improper finishing, or cracks from skipped control joints), you're looking at either living with the result or tearing it out and starting over. On a 600-square-foot pour, the demo and redo costs can easily wipe out your savings. DIY makes more sense if you've poured smaller slabs before, have access to the right equipment, and have a helper who knows what they're doing. If this is your first large pour, the professional route is worth the extra cost. The labor and expertise is genuinely where the value is on a job this size.
How concrete stacks up against other patio materials at this size
Concrete is one of the most cost-competitive patio materials available, especially at 600 square feet where the economies of scale from a single pour work in your favor. Here's how it compares to the most common alternatives at the 20x30 size:
| Material | Installed Price Per Sq Ft | 600 Sq Ft Total | Key Trade-Offs |
|---|---|---|---|
| Standard broom concrete | $6 – $10 | $3,600 – $6,000 | Most affordable; durable; cracks over time; hard to repair invisibly |
| Stamped concrete | $12 – $20 | $7,200 – $12,000 | Attractive; lower cost than pavers; needs regular resealing |
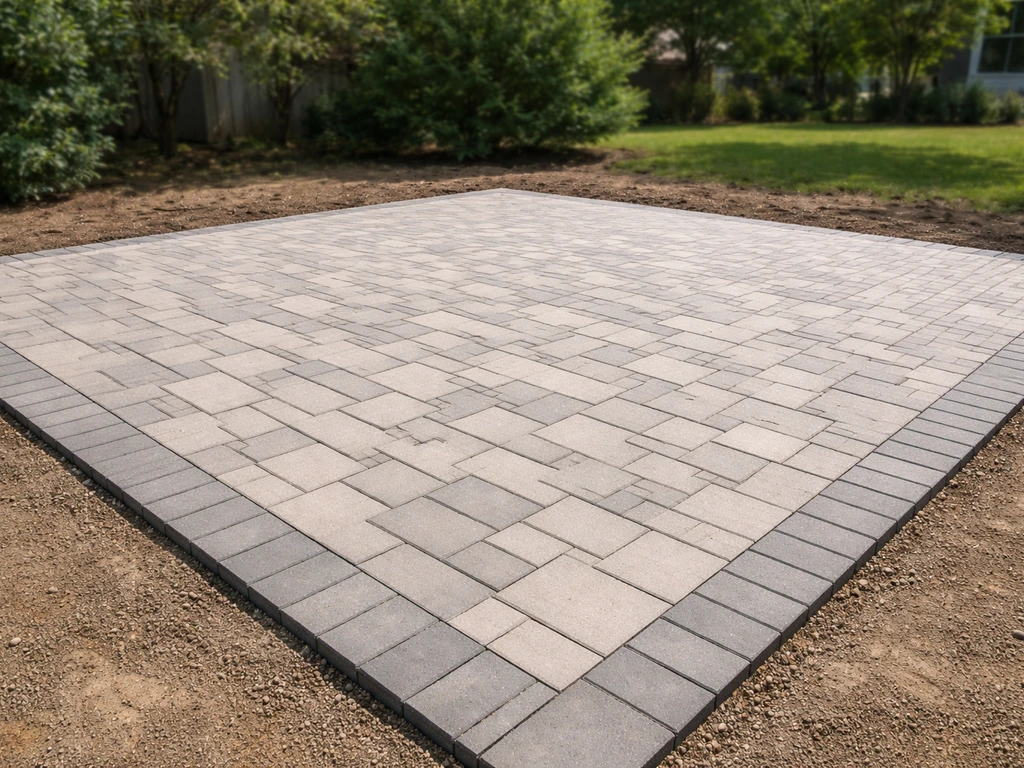
| Concrete pavers | $15 – $25 | $9,000 – $15,000 | Individual units easy to replace; higher upfront cost; can shift |
| Natural flagstone | $20 – $35 | $12,000 – $21,000 | Highest-end look; most expensive; very durable if set properly |
| Brick | $14 – $20 | $8,400 – $12,000 | Classic look; durable; labor-intensive to install; can shift |
| Gravel / decomposed granite | $2 – $6 | $1,200 – $3,600 | Cheapest option; not as durable or polished; low maintenance |
If budget is the primary driver and you want a durable, long-lasting surface, standard concrete is hard to beat at 600 square feet. If aesthetics matter and you're willing to pay more, stamped concrete at $12 to $20 per square foot gives you the look of pavers or stone at a lower total cost than most paver installations. For a comparison closer to this size, a 20x20 stamped concrete patio follows similar per-square-foot logic but at 400 square feet, so the total cost is proportionally lower. Paver patios at the 20x20 size also show similar price-per-foot ranges as described above, just applied to a smaller footprint.
Two example budgets: basic vs. upgraded

Scenario 1: basic broom-finish on a flat lot
Flat yard, good soil, no demo needed, straightforward access. Four-inch slab with wire mesh, gravel base, broom finish, no sealer. This is the most stripped-down professionally installed job you'd reasonably expect a contractor to do properly. Estimated total: $4,500 to $6,500. At $7.50 to $10.80 per square foot, this is your baseline number for apples-to-apples comparison.
Scenario 2: stamped concrete with color and sealer
Same flat lot, but upgrading to a stamped pattern (ashlar slate or cobblestone), integral color, a contrasting border, and a high-quality acrylic sealer applied after cure. Four-inch slab with #3 rebar. Estimated total: $10,800 to $15,000. At $18 to $25 per square foot, this is what most people end up paying when they want something that genuinely looks like a high-end outdoor space rather than a plain gray slab.
How to get accurate, comparable contractor quotes
Getting three quotes is standard advice, but getting three useful quotes requires a bit of preparation on your end. If you just ask "how much to pour a patio," you'll get three wildly different numbers based on three different assumptions about what's included. Here's how to make them comparable:
- Measure your space and confirm the square footage. For a 20x30 patio, that's 600 square feet. Write it down and give every contractor the same number.
- Specify the slab thickness. Tell contractors you want a 4-inch slab (or 5-inch if you have reason to). Ask them to quote that thickness and note it on the bid.
- Ask for reinforcement specs. Request that the quote specify whether it includes #3 rebar on an 18-inch grid, wire mesh, or no reinforcement, and at what spacing.
- Ask what sub-base preparation is included. A quality bid should include excavation to proper depth, compacted gravel base (4–6 inches of crushed stone), and any grading needed for drainage slope.
- Request an itemized bid, not just a total number. You want to see site prep, materials, labor, and any optional line items broken out separately.
- Ask about control joints. Confirm whether they're saw-cut after cure or tooled in during pour, and how frequently they'll be placed.
- Clarify sealing. Is it included? What product? One coat or two?
- Ask about lead time and payment schedule. Reputable contractors usually ask for a deposit (10 to 30 percent) and the balance on completion, not full payment upfront.
- Ask whether a permit is required for your municipality and who pulls it. If a permit is needed, it should be the contractor's responsibility to obtain it, not yours.
- Confirm the cure time before use. A properly poured concrete slab needs at least 24 to 48 hours before light foot traffic and 7 days before furniture or heavy use. Ask if they'll apply a curing compound.
One more practical note: concrete work is seasonal in most of the country. Spring and early fall tend to be peak booking times, which means lead times can stretch to several weeks. If you're planning for summer use, start getting quotes in late winter or early spring. Booking in late fall or winter sometimes comes with a modest discount since contractors are filling slower schedules.
Either way, getting your specs locked down now and requesting itemized bids from at least three local contractors is the fastest path to knowing what your specific 20x30 patio will actually cost. If you're wondering how much a 20x20 paver patio costs DIY, the same quote comparisons and line-item prep help you estimate materials and labor realistically 20x30 patio.
FAQ
What’s included in the price if I ask for a 20x30 concrete patio quote, and what should I ask them to spell out?
Ask for an itemized breakdown that clearly lists demo/removal (if any), excavation and haul-off, sub-base type and depth, vapor barrier (if used), slab thickness, reinforcement (rebar or mesh and spacing), edge forms, finish type, curing/sealing, and whether control joints are included. Also confirm delivery setup, concrete scheduling (start time), and any permit or inspection fees, since those can change the total even when the per-square-foot looks similar.
Does the cost change if my patio is on a slope or uneven yard?
Yes, slopes usually increase excavation and regrading, and may require additional base material and formwork. Expect the quote to shift upward if the contractor has to build a step-down section, retain soil, or correct drainage, because labor time increases and there is more risk in getting the slab level without added thickness.
How much does adding steps, a landing, or a thicker entry area cost on top of a standard 20x30 slab?
Custom elevations usually raise costs because they are treated like extra forming and concrete volume, not just added finish. If the entry needs thicker sections, additional reinforcement, or an integrated landing, ask whether they are pricing by linear foot (for forms and edges) and cubic yards (for added concrete), since that’s often where the biggest “quote surprises” appear.
If I have existing concrete, can I pour over it to reduce cost?
Sometimes, but it depends on condition and prep. Contractors typically require removal of weak or spalled areas, proper grinding, and evaluation of cracking and drainage. If they cannot reliably bond or level over the existing slab, they will price demolition and replacement, which usually erases any savings from “concrete only.”
Do I need a sealer, and how does choosing one affect long-term cost?
A sealer helps protect against staining and weathering, and the article notes resealing is typically needed every 2 to 3 years for decorative work. For the cheapest option, ask whether the quote includes a basic penetrating or acrylic sealer, and whether it includes maintenance guidance. Skipping sealing can reduce short-term cost but may increase discoloration and cleaning issues later.
What’s the difference in cost and performance between #3 rebar and wire mesh for a 20x30 patio?
Rebar generally costs more but is better at holding cracks together if the slab moves. Wire mesh is often a lower-cost line item, yet it may not provide the same crack-control benefit once cracking begins. If your soil is expansive or you’re in freeze-thaw areas, it’s worth asking for the exact reinforcement spec, including grid spacing and slab thickness.
Will control joints alone prevent cracks, or do they just manage where cracks happen?
Control joints don’t stop cracking entirely, they guide cracking into straighter, less noticeable lines. If joints are skipped or spaced too far apart, cracks can appear randomly across the surface, which can lead to worse aesthetic outcomes and potentially more maintenance. Ask what joint spacing they use (8 to 10 feet is common) and whether they are tooled or saw-cut as part of the bid.
Is it cheaper to go thinner if I’m not parking on the patio?
Often, but most reputable contractors won’t drop below the standard residential 4-inch thickness for a reason. Thinner slabs can increase the risk of cracking and surface problems, especially with heavy outdoor furniture movement or occasional concentrated loads. If you want to reduce cost, ask where else you can adjust, like finish level or reinforcement details, instead of reducing thickness.
How do I compare quotes when one contractor includes demolition, grading, and sealing and another doesn’t?
Use the per-square-foot number only after confirming what’s included, because quotes can vary dramatically by scope. Request the same line-item list across all bids (prep, base depth, reinforcement, joints, edges, finish, sealing) and confirm the slab specs match (thickness, reinforcement type, and finish category). If one quote excludes sealing or uses a different base depth, it will likely be misleadingly low.
Why do bids vary by region by so much, even for the same 20x30 size?
Labor rates and the price to deliver ready-mix can vary, and those swing the installed total. Quote timing matters too, because concrete work is seasonal, and peak booking periods can increase lead times and sometimes pricing. If you can, lock your specs, request itemized bids, and compare totals within the same time window to reduce seasonal distortion.
What’s a realistic DIY-material vs installed cost gap, and when does DIY stop making sense?
The article indicates DIY materials-only estimates can land far below installed pricing, but the risk of costly mistakes rises quickly on a 600-square-foot pour. DIY becomes much riskier if you do not have experience with flatness, timing, curing, and joint placement, because demo and redo costs can wipe out savings. If it’s your first large slab, most homeowners underestimate the labor and “on-time” coordination required for delivery and finishing.
If I want a decorative look, what costs the most per square foot, stamping or color?
Decorative sealer and the combined decorative process usually drive the higher tiers. Stamped work typically needs more skilled labor and takes longer, and color adds an additional incremental cost on top of plain concrete. If your goal is the look of pavers, ask what combination they are including (stamping only, integral color, dry-shake color, border pattern, and the specific sealer type and application timing).
Next Articles
How Much Does a 20x20 Concrete Patio Cost?
Estimate the total cost of a 20x20 concrete patio, with labor, materials, prep, finish options, and DIY vs pro pricing.
How Much Does a 20x20 Stamped Concrete Patio Cost?
Get real 20x20 stamped concrete patio costs, price breakdown, drivers, and per sq ft budgeting tips vs pavers or stone.
How Much Does a 20x20 Paver Patio Cost? Complete Cost Guide
Cost range for a 20x20 paver patio with line-item breakdown, labor, DIY vs pro tips, and contractor quote questions.