A patio should slope away from your house at 1/4 inch per foot (about 2%). That means for every foot of patio running away from the house, the surface drops a quarter inch. If you want a range to work with, anything between 1/8 inch and 1/4 inch per foot is acceptable, but 1/4 inch per foot is the sweet spot that almost every contractor, concrete guide, and paver manufacturer converges on. Less than that and water pools. More than that and it starts to feel noticeably tilted underfoot.
How Much Fall for a Patio: Measure the Slope Correctly

Felix Carver
29 Apr 2026
The target slope: what 1/4 inch per foot actually means
A slope of 1/4 inch per foot equals roughly 2% grade. Both ways of saying it mean the same thing: drop two inches for every eight feet you travel away from the house. That's the standard from ACI 302.1R (the American Concrete Institute's concrete flatwork guidance), repeated in Home Depot's paver installation guides, and echoed by the Interlocking Concrete Pavement Institute (ICPI), which sets a minimum of 1% but recommends 2% in practice.
The IRC (International Residential Code, section R401.3) takes a slightly different approach for the yard around a foundation: blank" rel="noopener noreferrer">it calls for a minimum 6-inch drop within the first 10 feet of the structure. That works out to about 0.6 inches per foot, which is steeper. That code targets general lot grading, not finished patio surfaces. Your patio still targets 1/4 inch per foot, but if the grade around your yard was already sloping toward the house before you pour the slab, you may need to re-grade a wider area first.
The practical upper limit is about 1/2 inch per foot. Beyond that, you'll notice the tilt when you're sitting on the patio, furniture feels unstable, and water rushing off too fast can cause erosion at the edge. A range of 1/4 to 3/8 inch per foot hits the ideal balance between drainage and comfort for most homeowners.
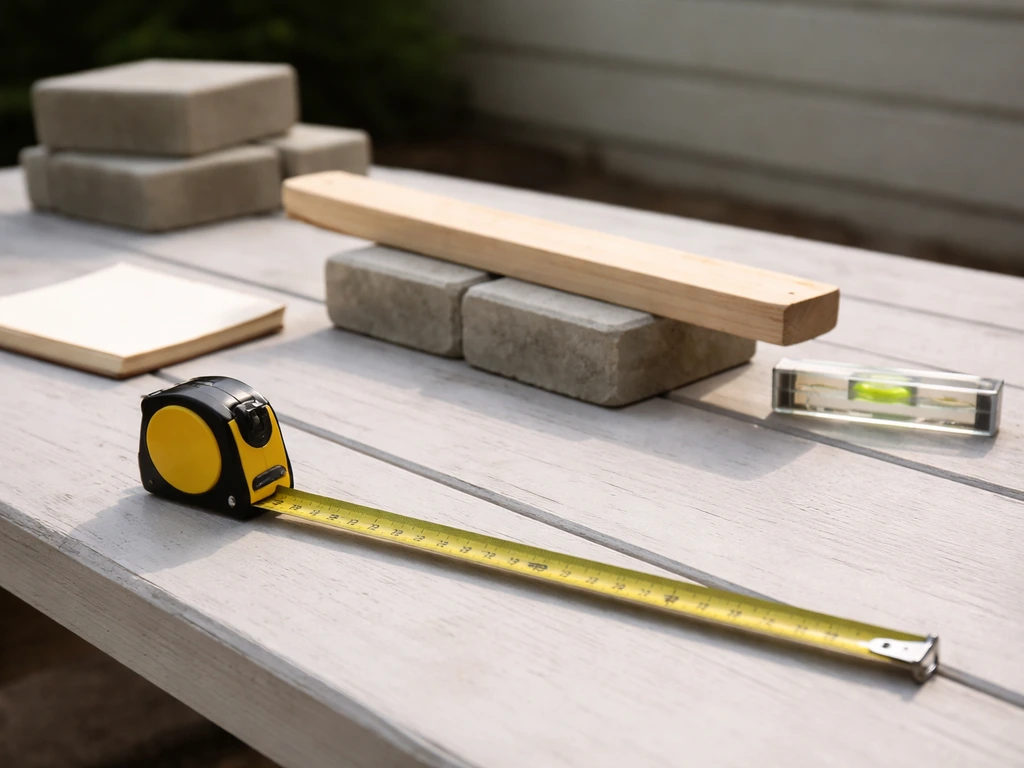
How to measure fall correctly (without fancy equipment)
You don't need a laser transit to set slope correctly, though one makes it faster. Here's how to do it with a basic level, a tape measure, and a string line.
String line method
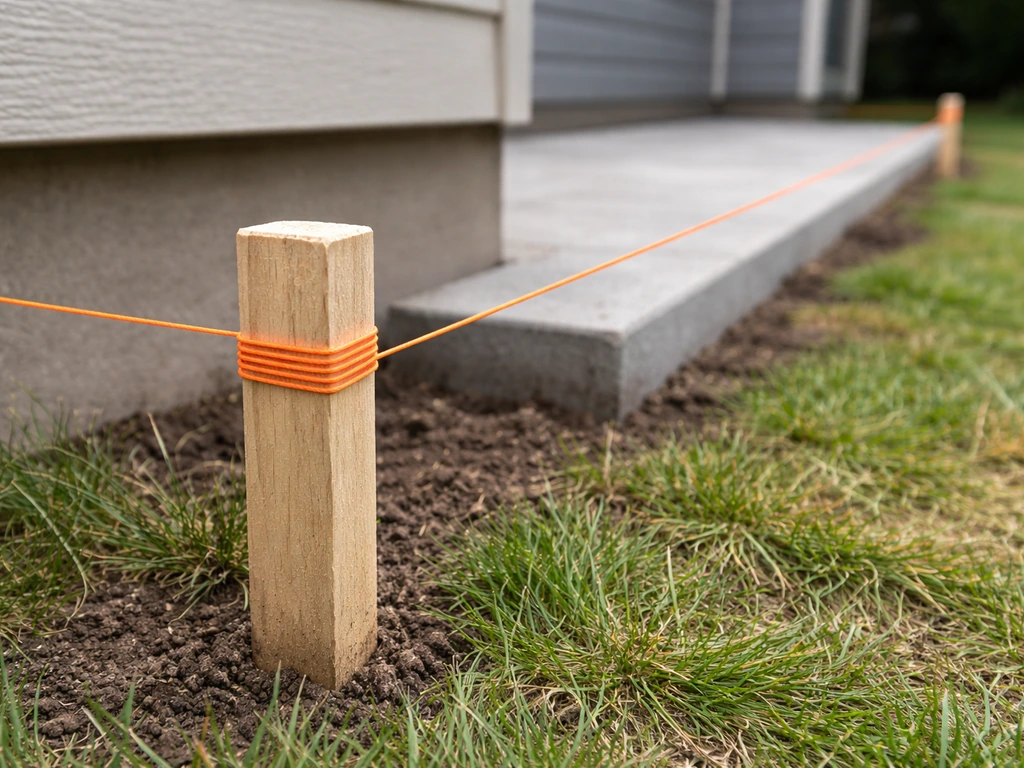
- Drive a stake right at the base of your house wall (or the edge of your door sill) and tie a string at the finished patio height you want at that point.
- Drive another stake at the far edge of the patio. This is your low point.
- Tie the string level (use a line level or bubble level on the string) between the two stakes so it's perfectly horizontal.
- Measure the total run (distance from house stake to far stake) in feet.
- Calculate the required drop: multiply total run in feet by 0.25 inches. So a 12-foot run needs 3 inches of drop.
- Lower the string at the far stake by exactly that calculated drop. The string now represents your finished slope.
- Use this string as your guide for setting subbase grade, bedding sand, and final surface height.
One gotcha with string lines: if the string sags in the middle over a long span, you'll end up with a low spot in the center of the patio. Pull the string tight, use intermediate stakes for runs longer than 12 feet, and double-check the sag before you start grading. Western Interlock specifically warns about this: a string stretched loosely over contours will give you false readings in the middle of the run.
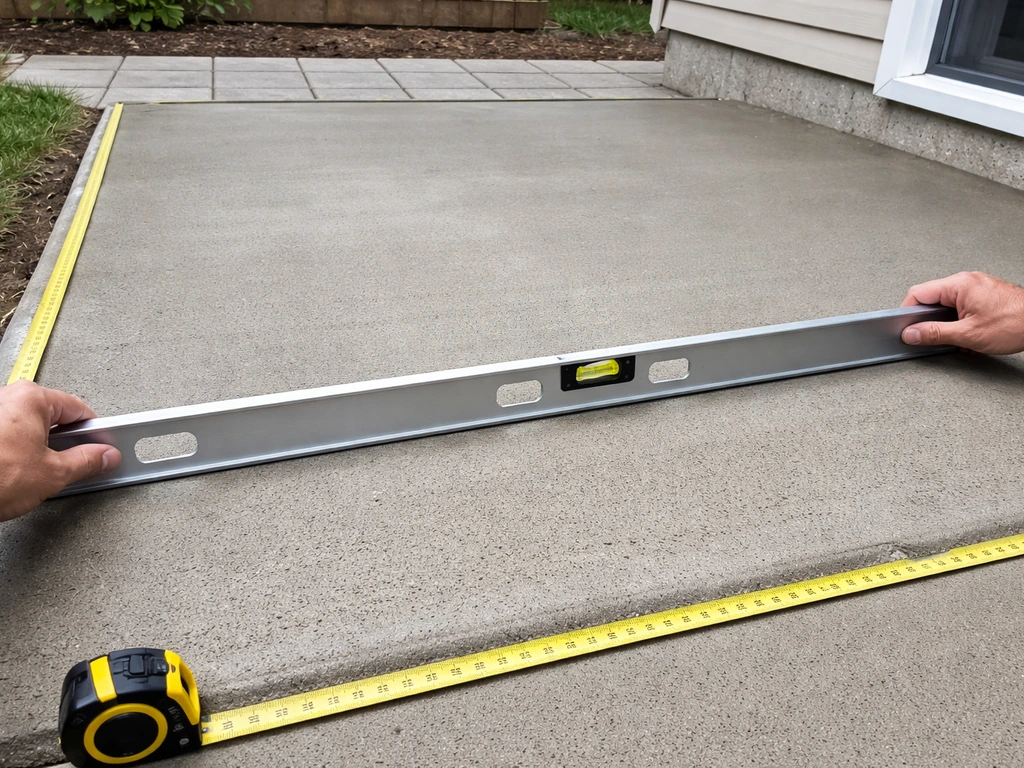
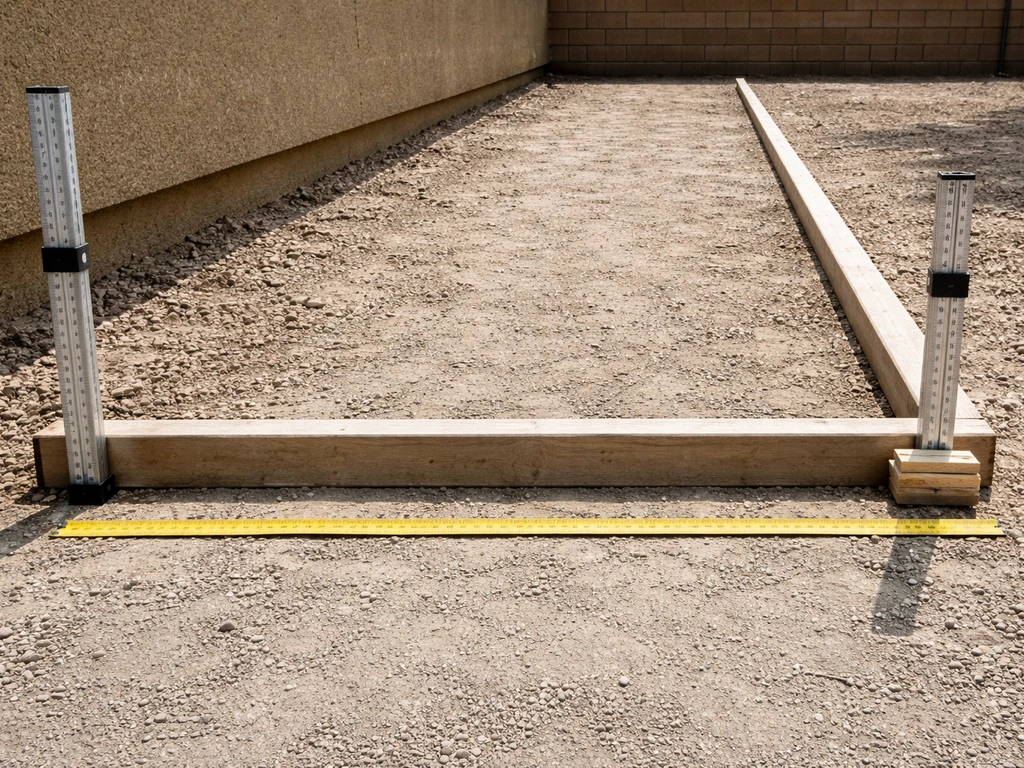
Using a 4-foot level
Place your level on the patio surface (or on your screed board during installation). For a 4-foot level, 1/4 inch per foot means you want the bubble reading to show 1 inch of drop over the full 4 feet. Put a 1-inch shim under the low end of the level, and when the bubble reads perfectly level with the shim in place, your surface is sloping at exactly 1/4 inch per foot. This trick is fast and reliable for checking your work as you go.
Laser level
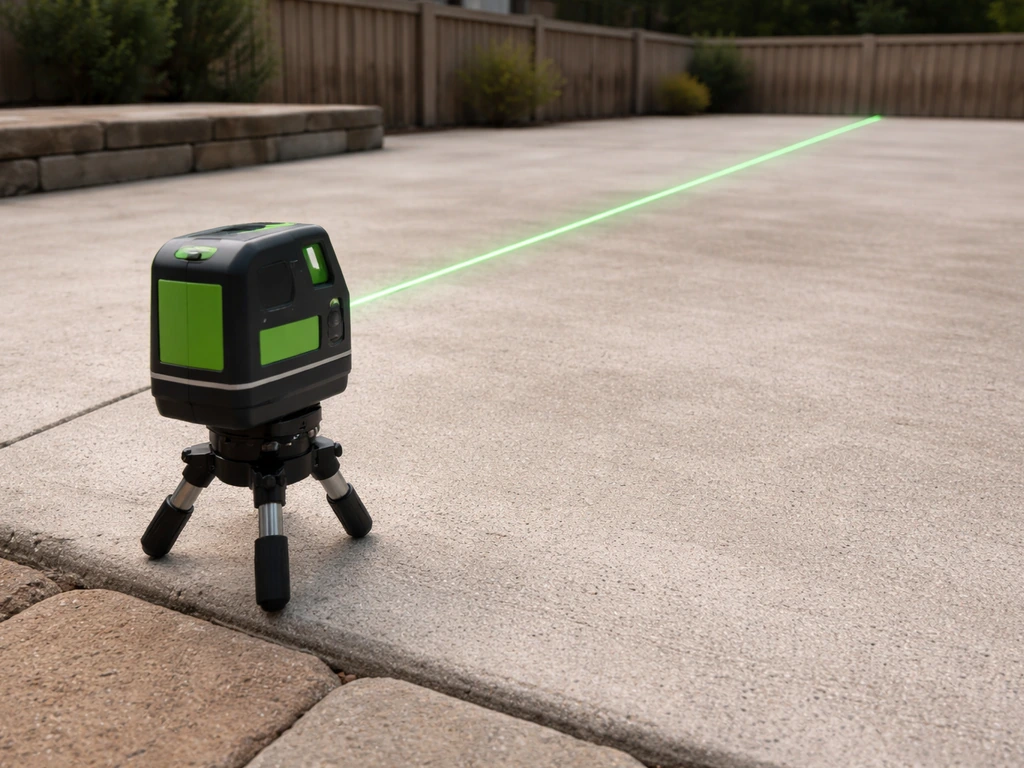
A laser level speeds up the process considerably and is worth renting for larger patios (cost is typically $40 to $80 per day). Set the laser at a known reference height at the house, shoot it to your grade stakes at the far edge, and read the difference on a grade rod. Compare actual difference to your target (run in feet multiplied by 0.25 inches). If you're hiring a contractor, ask whether they use a laser transit to verify finish grade before they pour or set pavers. This is standard practice and a good sign they're being precise.
Drainage basics: where should the water actually go?
The slope directs water, but you also need a plan for where it ends up. Running water off a patio into a lawn is fine if the lawn can absorb it. Running it into a bed of mulch right next to the house is not. Here are the main options for where to route runoff:
- Lawn or planted area: works well if the lawn is level or slopes away, and the patio is not oversized relative to the absorption area.
- French drain along the patio's low edge: perforated pipe buried in gravel, running to daylight or a dry well. Good when you have tight spaces or heavy rainfall.
- Dry well: a gravel-filled pit that handles roof and patio runoff in areas without a natural outlet. Requires sizing for your rainfall intensity.
- Trench drain between patio and house: a narrow channel drain that intercepts water before it can reach the foundation. Useful when doors or architectural features limit how much slope you can get close to the house.
- Pop-up emitter tied to a catch basin: a small grated drain in the patio surface connected to underground pipe that daylights somewhere in the yard.
Common mistakes that cause problems
- Sloping toward the house: the most dangerous mistake. Water saturates the soil next to the foundation, causing settling, moisture intrusion, and eventually structural problems.
- Sloping parallel to the house instead of away from it: water runs along the foundation rather than away from it. Looks fine until you get heavy rain.
- Uneven subgrade creating low spots: even with the right average slope, a dip in the subbase means a puddle on the finished surface. Compact and verify subgrade before laying base material.
- Grading changes that redirect neighbors' water toward your house: re-grading your yard can alter natural drainage patterns. Always think about where water comes from, not just where you want it to go.
- Backfill settlement over time: improperly compacted backfill against the house settles and tips the patio back toward the foundation after a few years. This is why compaction in 4-inch lifts matters, not just final surface grade.
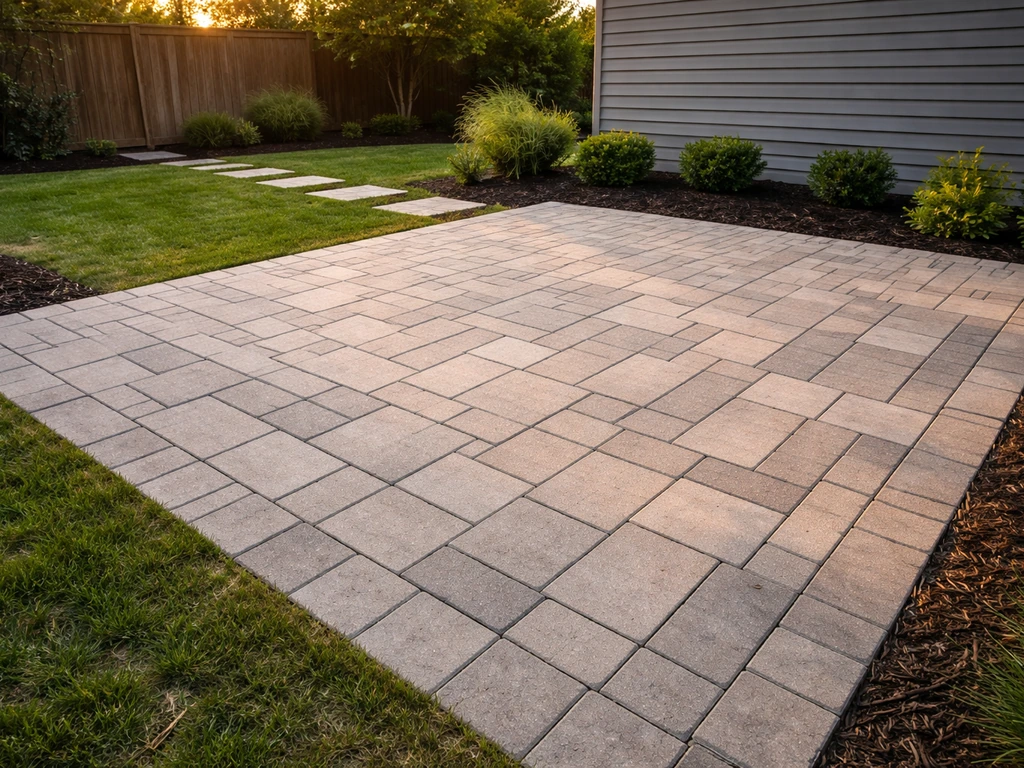
Slope recommendations by patio material
The 1/4 inch per foot rule applies across all patio types, but there are a few surface-specific nuances worth knowing before you plan.
| Patio Type | Minimum Slope | Recommended Slope | Special Considerations |
|---|---|---|---|
| Poured concrete | 1/8" per foot (1%) | 1/4" per foot (2%) | Slope must be built into formwork before pour; can't be corrected after |
| Concrete pavers | 1% (per ICPI) | 1/4" per foot (2%) | Joint sand helps minor drainage; slope primarily set in base/bedding |
| Brick pavers | 1/8" per foot | 1/4" per foot | Mortar joints hold firm; rely on overall surface slope for drainage |
| Flagstone (dry-laid) | 1/4" per foot | 1/4–3/8" per foot | Irregular surfaces can hold water in natural depressions; slightly more slope helps |
| Stamped concrete | 1/4" per foot | 1/4" per foot | Texture patterns can slow water movement; don't reduce slope for stamped finishes |
| Gravel/decomposed granite | 1/8" per foot | 1/4" per foot | Permeable surface offers some tolerance; slope still needed for heavy rain events |
For concrete pavers and brick, the slope is primarily created in the compacted base layer and the 1-inch bedding sand layer, not the pavers themselves. The ICPI technical specs treat the 1-inch sand bedding as part of the slope system: if your base is correctly graded at 2%, the sand and pavers follow that grade, assuming consistent bedding thickness.
An ICPI Tech Spec 19 document hosted by Angelus Paving Stones indicates that typically a minimum 2% slope is sufficient and discusses slope ranges of about 1/8 in to 1/4 in (3 to 6 mm) above adjacent drain-… areas minimum 2% slope is sufficient and slope ranges of about 1/8 in to 1/4 in (3 to 6 mm).
If the bedding sand is screeded thicker in some spots to compensate for a poorly graded base, you'll get inconsistent settlement over time.
Dry-laid flagstone and natural stone have irregular surfaces that naturally hold small pockets of water. Adding slightly more slope (closer to 3/8 inch per foot) reduces the pooling in these natural low spots. Mortar-set flagstone behaves more like concrete and can hold 1/4 inch per foot reliably.
For stamped concrete specifically: don't let a contractor reduce the slope to make the stamping process easier. Textured surfaces actually slow water movement slightly, which is a reason to maintain the full 1/4 inch per foot rather than reducing it.
Edges, thresholds, and the house wall
The transition between the patio and the house is where most drainage problems actually start. Here's how to think through the key details before installation begins.
Door threshold clearance
The patio surface at the door should sit at least 1 to 2 inches below the door sill (the bottom of the door frame or threshold). This gap prevents water from wicking under the door during heavy rain. It also gives you enough vertical room to slope the patio away from the house without the far edge ending up at an awkward height relative to the lawn. Measure your sill height before you set your reference stake. If the sill is unusually low, you may need to install a trench drain right at the door to intercept water before it can enter.
Where the patio meets the house wall
Leave a small gap (around 1/4 to 1/2 inch) between the patio edge and the house wall, filled with a flexible backer rod and sealant. This expansion joint prevents the slab from cracking against the foundation as it moves seasonally. It also allows any water that runs along the wall to drain down rather than sit against the concrete. For paver patios, this gap is less critical but still good practice.
Catch basins and channel drains
If you can't get enough fall because of door height constraints, a covered drain running laterally across the patio (called a trench drain or channel drain) near the house is your best option. It intercepts sheet flow before it reaches the wall. These are connected to underground pipe that daylights in the yard or ties into an existing drain line. Installation adds cost: expect $300 to $700 for a basic linear channel drain depending on length and pipe routing. A catch basin with a pop-up emitter runs a bit less, around $150 to $400 installed.
Borders and raised edges
A raised decorative border around a patio's outer edge looks sharp but can act as a dam. If you're adding a border of brick, raised pavers, or a concrete curb, make sure there's a break or low point in it that aligns with the slope's low end. Otherwise you've essentially built a shallow swimming pool.
Quick calculations for common patio sizes
Here's how the math works out using the standard 1/4 inch per foot slope. The "run" is the distance the patio extends away from the house. If you know the patio dimensions, you can estimate how much total fall you need and budget for the right amount of slope work how much patio. The "total fall" is the height difference between the high point (at the house) and the low point (far edge).
| Patio Size | Run from House | Total Fall at 1/4"/ft | Total Fall at 1/8"/ft |
|---|---|---|---|
| 10x10 ft | 10 feet | 2.5 inches | 1.25 inches |
| 12x12 ft | 12 feet | 3 inches | 1.5 inches |
| 12x16 ft | 12 feet | 3 inches | 1.5 inches |
| 16x20 ft | 16 feet | 4 inches | 2 inches |
| 20x20 ft | 20 feet | 5 inches | 2.5 inches |
| 20x30 ft | 20 feet | 5 inches | 2.5 inches |
For most average patios (10x10 to 12x12), you're looking at 2.5 to 3 inches of total fall from back to front. That's modest and won't be noticeable when you're sitting on the patio. A 20x20 ft patio drops 5 inches from house to far edge at full slope, which is still comfortable. If you're going even larger, say 30 feet deep, you'd hit 7.5 inches of drop. At that point some contractors will introduce a cross-slope or a mid-patio drain to break the run into manageable segments.
For metric users: 1/4 inch per foot equals approximately 20 mm per meter. So a 3-meter run drops about 60 mm (6 cm), a 4-meter run drops about 80 mm, and a 6-meter run drops about 120 mm.
DIY vs. hiring a contractor: what slope work actually costs
Getting the slope right has a real cost impact that most homeowners don't factor into their initial budget. For a general budget, see this guide on how much to do a patio for typical labor and materials. If you are trying to budget, the next step is to look at the average cost of a patio based on size, materials, and site grading needs. If you are trying to budget, the next step is to look at the average cost of a patio based on size, materials, and site grading needs, including how much are patios for your specific dimensions. Whether you're doing it yourself or hiring out, here's what affects the price.
DIY grading and slope
If you're doing a DIY paver patio, grading the slope yourself is realistic for smaller patios (10x10 to 12x12) where you're moving manageable amounts of soil. The tools you need: rented plate compactor ($60 to $100/day), a 4-foot level, stakes, and mason's line. For the excavation itself, renting a mini excavator runs about $200 to $400 per day. On a 10x10 patio at typical base depth, you're removing roughly 1 to 1.5 cubic yards of material, which fits in a pickup truck or small trailer. Budget $50 to $150 for dump fees depending on your area.
The biggest DIY risk isn't the math, it's compaction. Poorly compacted subbase leads to settling that wrecks your carefully set slope over time. Rent the plate compactor, compact in 4-inch lifts, and don't skip it to save $80.
Contractor pricing and the slope factor
When you get quotes for a concrete or paver patio, the grading work is often bundled into the per-square-foot price, but significant regrading is not. If your yard slopes toward the house right now, correcting that before laying a patio is extra work. If you want a rough ballpark before a site visit, review how much does a patio pool cost and how grading and drainage can affect it. Expect a regrading surcharge of $200 to $800 for typical small patio sites, depending on how much soil needs to move and whether equipment like a skid steer is required.
If an existing patio needs to be torn out because it was sloped wrong (a more common situation than you'd expect), demo costs run about $5 to $10 per square foot. If you’re wondering how much are patios in your area, this demo-and-rebuild pricing is one of the cost drivers to ask about costs run about $5 to $10 per square foot. A poorly sloped 12x12 concrete patio costs $720 to $1,440 just to remove before you can start over. That number makes it very worth getting right the first time.
Cost comparison at a glance
| Task | DIY Cost | Contractor Cost | Notes |
|---|---|---|---|
| Grading/sloping for a 10x10 patio | $100–$250 (tools + dump fees) | $150–$400 (bundled in quote) | Usually included in standard install quotes |
| Regrading existing slope issue | $200–$500 (equipment rental + haul) | $300–$800 surcharge | Needed when existing grade slopes toward house |
| Demo of existing wrong-sloped slab | Not recommended DIY | $5–$10/sq ft ($720–$1,440 for 12x12) | Add this if starting over |
| Laser level rental (DIY slope check) | $40–$80/day | Included in contractor overhead | Worth it for patios larger than 12x12 |
| Channel/trench drain installation | $100–$300 in materials | $300–$700 installed | Needed when door threshold limits slope options |
| Dry well installation | $200–$500 in materials | $500–$1,200 installed | Required when there's no natural drainage outlet |
The overall cost of your patio project (whether that's a simple concrete slab or a full paver installation) is heavily influenced by site conditions. To budget accurately, include the amount of slope and drainage rework your site needs, not just the patio surface how much should i expect to pay for a patio.
In most cases, patio slope is one of the biggest variables that changes the total price, so it helps to understand how much patio work you actually need. If you are planning patio work around a pool, you can use the same slope and drainage ideas to estimate how much patio around pool you might need for your footprint. A flat yard with good existing drainage makes slope work straightforward and cheap.
A yard that currently drains toward the house, or a site with clay soil that drains poorly, can add meaningful cost through grading work, drainage systems, and base material. When you're getting quotes, ask contractors specifically what their quote includes for grading and drainage, and whether your site requires any extra work. The slope question is small technically, but its answer shapes a meaningful chunk of the total project cost.
To estimate how much to do a patio, factor in slope/grading work, drainage fixes, and base materials, not just the surface you choose.
Your next steps before getting quotes
Before you call a contractor or buy materials, do this in an afternoon: measure how your yard currently drains. After the next rain, watch where water moves and whether any of it runs toward the house. If it does, that's the first thing to fix. Then measure your door sill height above the existing ground and do a quick slope calculation using the table above for your patio size.
This tells you whether your proposed patio height at the door works with the existing grade, or whether you need to raise or lower the far end significantly. Showing up to a contractor quote with this information will help you ask better questions and compare bids more accurately, whether you're pricing concrete, pavers, flagstone, or any other surface.
FAQ
How much fall should a patio have if it drains to a sidewalk or driveway instead of a lawn?
The 1/4 inch per foot target still applies, but you need to verify the receiving area can handle concentrated sheet flow. If the sidewalk or driveway has a curb or low edge that traps water, you may need a small channel drain at the transition so runoff exits the patio consistently.
What if my patio is only 6 feet deep, can I still use 1/4 inch per foot?
Yes, but the total fall is smaller, so minor grading mistakes matter more. For a 6-foot run, you only have about 1.5 inches of total fall. Use extra checking steps (multiple level checks across the width) to avoid a subtle low spot.
Should the slope be the same in both directions (cross-slope) or only away from the house?
Typically, the main fall is away from the house (back-to-front). If your patio is wider than about 12 feet or you notice uneven ground, contractors often add slight cross-slope to keep water from pooling near side edges. If you do add cross-slope, keep the overall drainage away from the house consistent so the door and wall areas stay protected.
How do I measure “fall” correctly if my patio will have stairs or a change in elevation?
Treat each elevation section as its own run. For example, a top landing and the stair run should each have slope away from the house or toward the intended drainage point, rather than assuming one slope over the entire footprint.
Can I rely on the base being “level” to get the patio slope right?
No. Even if your pavers or concrete finish looks level, the slope is set by the base and bedding layers. If the base is graded wrong and the paver sand is used to compensate, you risk uneven settlement that recreates puddling later.
What happens if the slope is slightly less than 1/8 inch per foot?
Even if puddles are not obvious immediately, water can linger in low areas and increase freeze-thaw stress for concrete or accelerate joint washout for pavers. A practical check after a rain is to look for dark, wet patches that persist longer than elsewhere on the patio.
What happens if the slope is too steep, like near 1/2 inch per foot?
Besides comfort and visible tilt, steep slopes can move water fast enough to erode soil at the edge or undermine thin base where drainage is uncontrolled. If you push beyond about 3/8 inch per foot, plan edge protection (proper base extension, stabilization, or a drain) so runoff has a safe path.
Do I need a slope under a covered patio roof or under a screened porch?
Yes, unless the manufacturer specifically designs a truly level slab with internal drainage, because condensation and wind-driven rain still create water flow. Ensure the intended drainage route is clear at the open edge or through a planned linear drain.
How can I check patio slope after installation if I do not have a laser level?
Use a consistent reference method: place a 4-foot level (or longer straightedge) on the finished surface at multiple locations and compare readings from near the house to the far edge. If you can, repeat the check with a small shim at the low end to confirm the expected drop.
Should I slope only the patio surface or also the adjacent soil?
Slope usually starts at the patio surface, but the surrounding grade matters because runoff can still migrate toward the foundation through gaps, cracks, or lawn-to-wall channels. If water currently drains toward the house, regrading a wider area or addressing it with a drain near the house may be necessary.
What slope problem is most likely near the door, and how do I prevent it?
The most common issue is water wicking under the door due to an incorrect final elevation at the threshold. Measure your door sill height above the existing grade first, and if you cannot achieve proper patio drop without getting the far edge too low or too high, plan a trench or channel drain near the door.
If I add a raised border around the patio, does the slope still matter?
Yes, but the border can unintentionally trap water if it becomes a dam. Make sure the border includes a break aligned with the low end of the slope, so runoff has an exit point instead of ponding behind the raised edge.
Next Articles

How Much to Do a Patio Cost in 2026 by Size
2026 patio cost by size with DIY vs pro ranges, material breakdowns, add-on pricing, and quote tips by region
What Is the Average Cost of a Patio in 2026?
Average patio cost in 2026 by size and material, with real breakdown for materials, labor, and site prep
How Much Does a Patio Pool Cost? Price Ranges and Tips
Estimate how much a patio pool costs with patio types, size benchmarks, realistic price ranges, and quote checklist.