A plain broom-finished concrete slab is almost always the cheapest patio to build in 2026. Installed, it typically runs $6 to $13 per square foot on a flat, accessible site, which puts a 12x12 patio at roughly $860 to $1,870 and a 20x20 at about $2,400 to $5,200. If you want to go even cheaper and are okay with something more informal, a compacted gravel or decomposed granite patio can come in under $1,000 total for a small yard. Everything else (pavers, flagstone, stamped concrete, brick) costs more once you factor in real installed prices.
What Is the Cheapest Patio to Build? Costs by Type

Felix Carver
8 Jun 2026
Why concrete wins on price (most of the time)
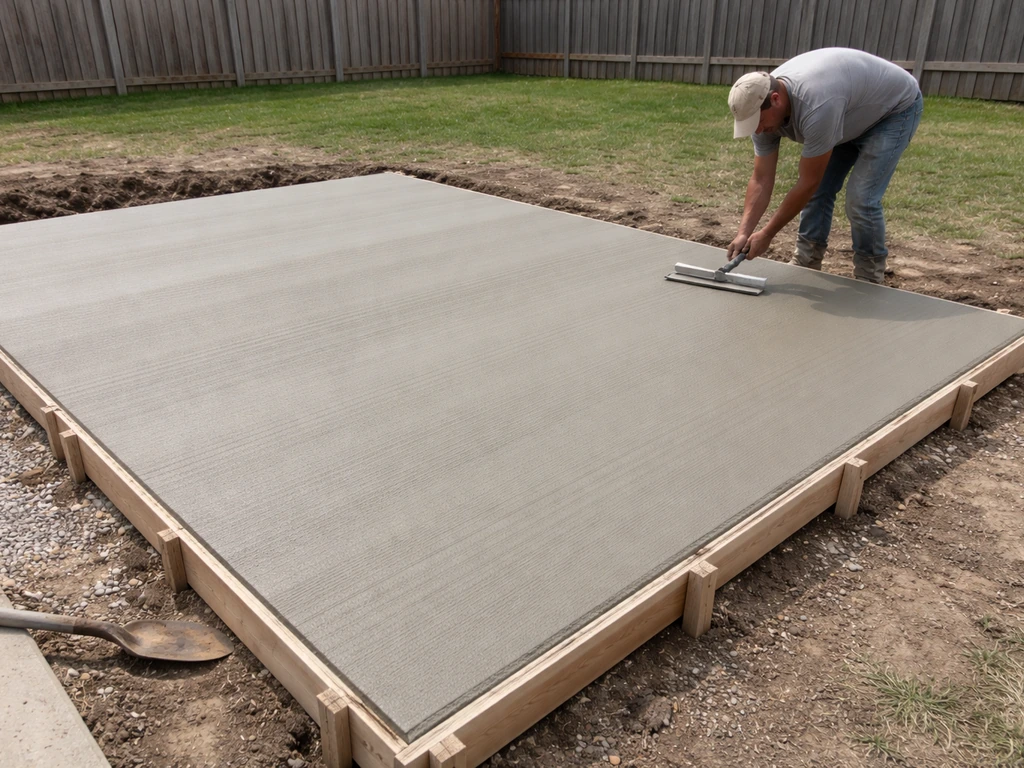
Concrete's cost advantage comes down to speed and simplicity. A crew can pour a plain slab in a day, the material is widely available, and there are no individual pieces to cut and set. The fewer steps involved, the lower the labor bill. Broom finishing, where the contractor drags a broom across wet concrete to add texture and traction, is the simplest finish you can get and costs nothing extra compared to a polished or stamped surface. That's why it anchors the low end of the pricing range.
The math only holds if your site cooperates. A flat yard with easy truck access, stable soil, and no drainage problems is where plain concrete shines. The moment you add slopes, clay soil, poor drainage, tree roots, or tight access for a concrete truck, costs climb fast. More on that below.
What actually makes up your patio cost
A patio quote isn't just materials. It's usually four distinct cost buckets, and the cheapest material can become the most expensive option if the other buckets balloon.
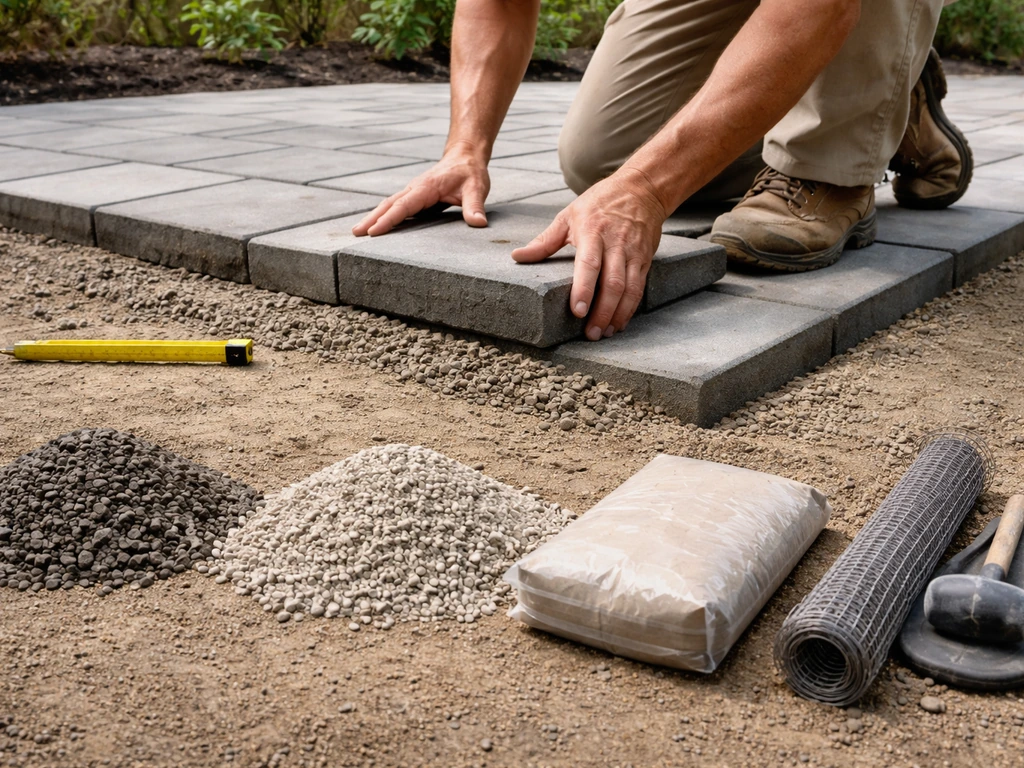
- Base prep: Excavation, grading, and compaction. For concrete, this typically means a 4-inch compacted gravel base. For pavers, you need 4 to 6 inches of crushed stone plus a 1-inch bedding sand layer. Skipping or skimping here is the number one cause of patio failures, sunken slabs, and void warranties.
- Materials: The concrete, pavers, stone, or gravel itself. This is the cost most people focus on, but it's often not the dominant expense on smaller jobs.
- Labor and installation: Forming, pouring or laying, finishing, cutting, joint work, and cleanup. Labor varies more by region than materials do.
- Finishes and extras: Sealers, stamping, staining, edge restraints (required for pavers), polymeric sand, control joints in concrete, and drainage slopes. These add up fast on decorative projects.
For concrete, the standard build assumes a 4-inch-thick slab with wire mesh or rebar reinforcement over a compacted gravel base, sloped about 1/4 inch per foot away from your house for drainage. That's the baseline. If your soil is soft or you're covering a load-bearing area, the slab goes to 6 inches and you add rebar, which bumps cost.
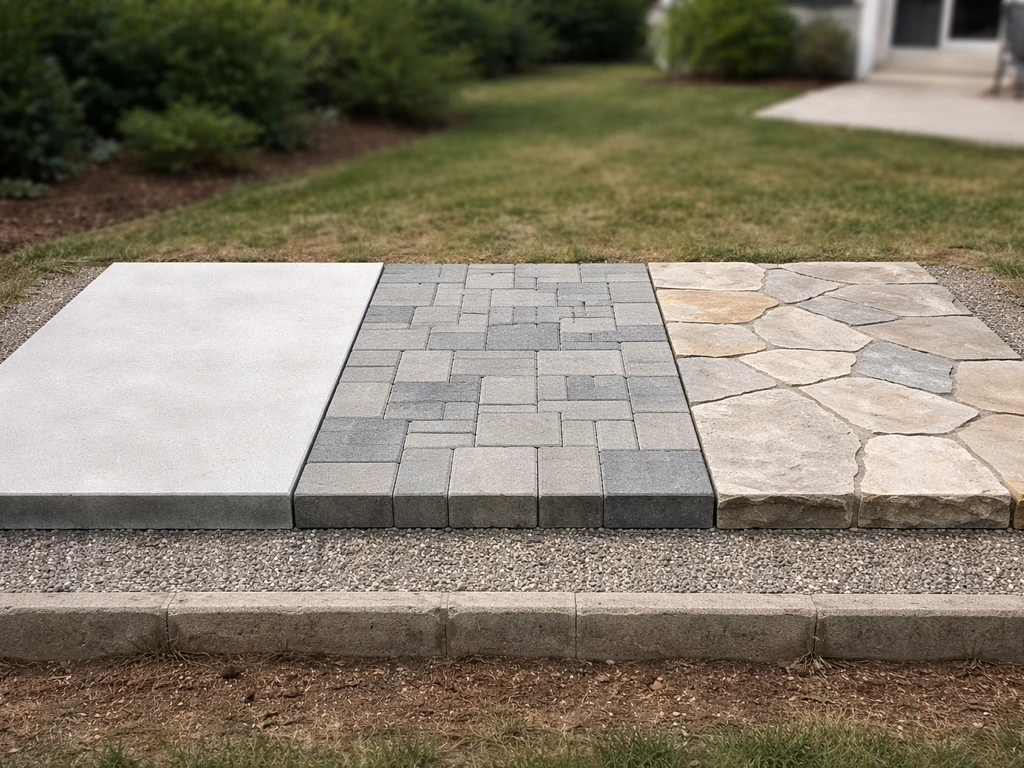
Price ranges by patio type and common sizes
Here's a side-by-side look at installed costs in 2026 across the most common patio materials. These are contractor-installed prices including base prep on a reasonably flat, accessible site. DIY costs are lower but have their own risks (discussed below).
| Material | Per Sq Ft (Installed) | 10x10 (100 sq ft) | 12x12 (144 sq ft) | 20x20 (400 sq ft) |
|---|---|---|---|---|
| Gravel / Decomposed Granite | $3–$6 | $300–$600 | $430–$865 | $1,200–$2,400 |
| Plain Broom-Finish Concrete | $6–$13 | $600–$1,300 | $865–$1,870 | $2,400–$5,200 |
| Stamped Concrete | $12–$18 | $1,200–$1,800 | $1,730–$2,590 | $4,800–$7,200 |
| Concrete Pavers | $12–$25 | $1,200–$2,500 | $1,730–$3,600 | $4,800–$10,000 |
| Brick | $14–$22 | $1,400–$2,200 | $2,015–$3,170 | $5,600–$8,800 |
| Flagstone (dry-laid) | $15–$25 | $1,500–$2,500 | $2,160–$3,600 | $6,000–$10,000 |
| Flagstone (mortared) | $20–$32 | $2,000–$3,200 | $2,880–$4,610 | $8,000–$12,800 |
A few things worth noting about this table. Gravel is the cheapest total number but also the least durable and least usable as a true outdoor living space. It shifts, weeds push through without landscape fabric underneath, and it doesn't hold furniture well. It works great for a casual path or a tucked-away seating corner but isn't ideal as a primary patio surface. Plain concrete is the sweet spot for most homeowners who want a real, permanent surface at the lowest installed price. Stamped concrete comes in cheaper than pavers on a per-square-foot basis in most markets, which is worth knowing if you like the paver look but want to control costs.
DIY vs. hiring a contractor: where you actually save
You can save 30 to 50 percent on some patio types by going DIY, but the savings depend entirely on which material you choose and how willing you are to do prep work right.
Pavers: the most DIY-friendly option
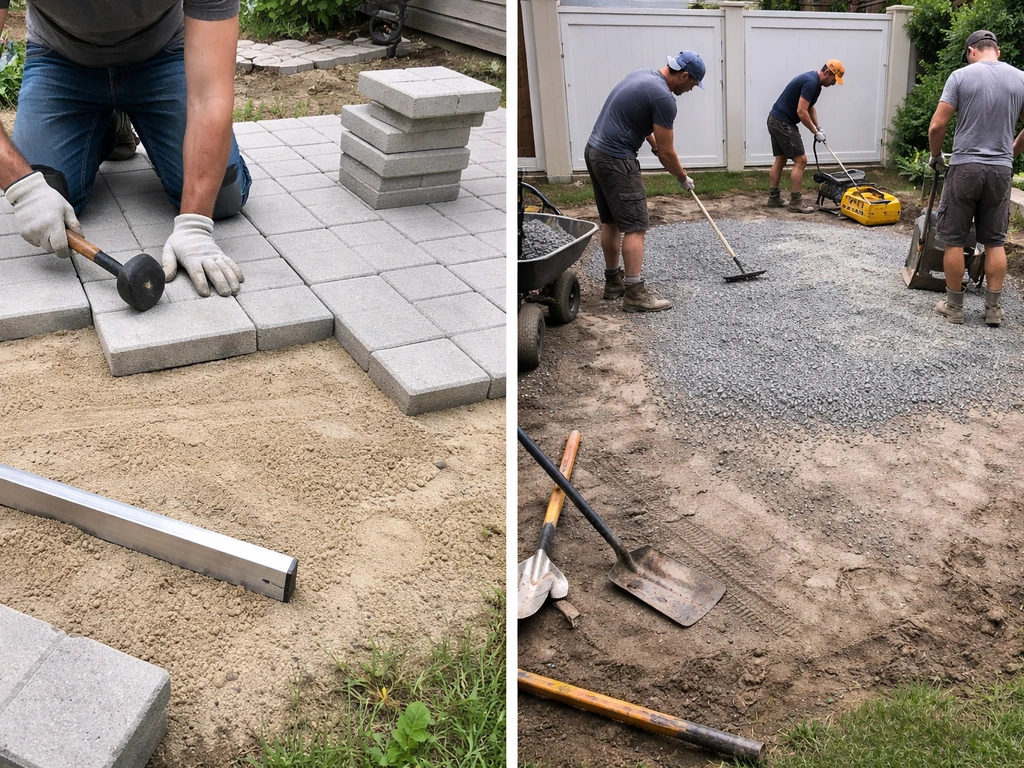
Paver installation is the most realistic DIY project for a homeowner with basic tools. Concrete pavers run $4 to $6 per square foot for materials alone, versus $12 to $25 installed. The catch is that the base work is physically demanding and has zero margin for shortcuts. Poor compaction, insufficient gravel depth, missing edge restraints, and wrong sand bedding are the top reasons DIY paver patios sink, shift, and collect standing water within a couple of years.
If you rent a plate compactor, buy the right gravel depth (4 to 6 inches of crushed stone), use polymeric sand in the joints, and install edge restraints on all sides, DIY pavers can be both affordable and long-lasting. If you cut corners on any of those steps, you'll be redoing it.
Concrete: DIY is risky for most homeowners
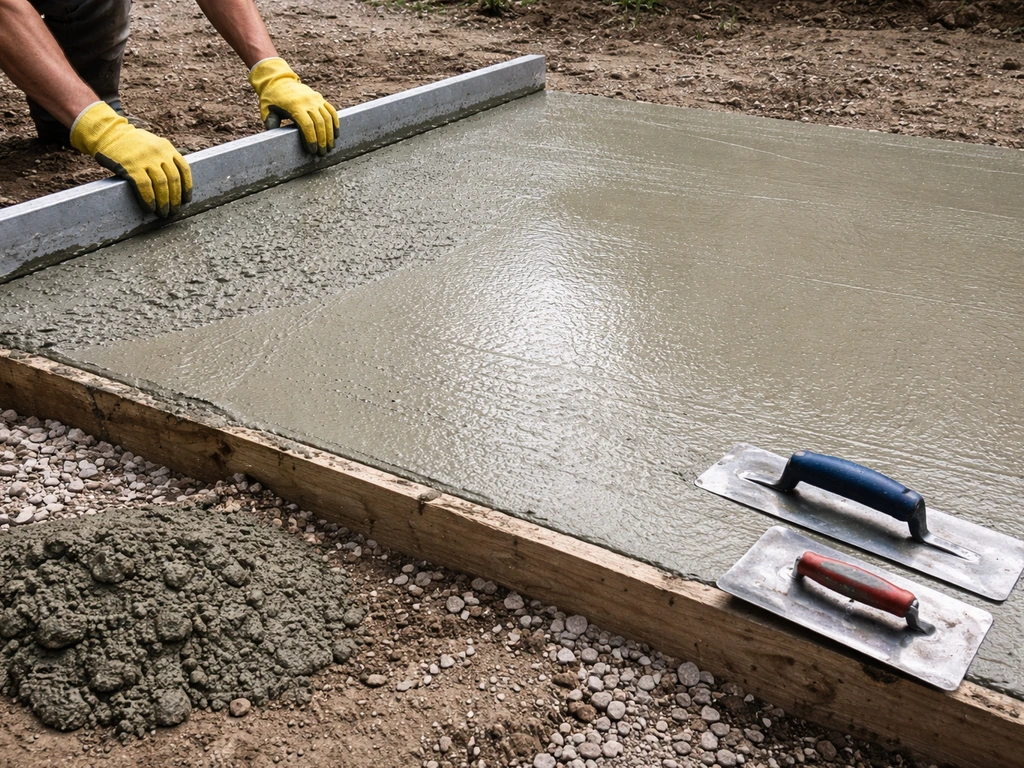
Pouring a concrete slab is not a good first DIY project. You're working with a material that has a short working window, needs to be placed, screeded, and finished before it starts to set, and requires proper control joints to manage cracking. Mistakes with curing and finishing are the most common reason DIY concrete patios develop surface defects, pop-off spalling, or crack in the wrong places. Unless you've poured concrete before or have an experienced friend helping, hiring a contractor for concrete usually makes more sense than trying to save money and ending up with a slab you hate looking at.
Gravel and flagstone: DIY works well
Gravel patios are the easiest DIY job. Excavate 4 to 6 inches, lay landscape fabric, add gravel, and compact. Dry-laid flagstone is similar: level the ground, add a gravel base and bedding sand, and set stones. Labor is the main cost driver for both of these at a contractor level, so doing it yourself saves the most here relative to the work involved.
Regional and site factors that change what's actually cheapest
"Cheapest patio" is always a local question. The per-square-foot ranges above assume average conditions, but several factors can flip the rankings entirely.
- Labor rates: Contractor labor in coastal metro areas (Seattle, San Francisco, Boston, NYC) can run 40 to 60 percent higher than in the Midwest or Southeast. A concrete patio that costs $8/sq ft installed in Ohio might run $13/sq ft in California, which narrows or eliminates the gap between concrete and pavers.
- Soil conditions: Rocky soil or clay-heavy ground requires more excavation, longer machine time, and sometimes imported fill. This adds $1 to $3 per square foot or more to any material type.
- Site access: If a concrete truck can't get within range, or if materials need to be wheelbarrowed through a gate, expect a premium of $2 to $5 per square foot just for access difficulty.
- Drainage problems: A yard that holds water or slopes toward the house needs grading work before any patio goes in. This base prep can add $500 to $2,000+ to the total job and applies to every material equally.
- Local stone availability: Flagstone and natural stone prices vary dramatically depending on how far the stone is shipped. In regions where flagstone is quarried locally (parts of the Mid-Atlantic, Texas Hill Country, Colorado), prices drop significantly. In coastal cities, the same stone can cost two to three times as much.
- Permit requirements: Some municipalities require permits for hardscape over a certain square footage. A permit adds $150 to $500 and potentially inspection time. Ask before you build.
The general rule: on a simple, flat, accessible site in a moderate-cost labor market, plain concrete is cheapest. On a difficult site with access problems and high labor costs, the difference between concrete and pavers shrinks, and sometimes gravel or a smaller concrete footprint becomes the smarter budget move.
How to estimate your job before calling contractors
You don't need a contractor to get a ballpark. Here's how to run a quick estimate yourself so you go into quotes with a realistic number in mind and can spot if someone is padding the bid.
- Measure your patio footprint in square feet (length x width). If it's an irregular shape, break it into rectangles.
- Pick your material and find the installed range from the table above (use the midpoint as your working number).
- Add 10 percent for waste and overages on materials.
- Assess your site: if you have any slope, clay soil, drainage issues, or access constraints, add 15 to 25 percent to the base estimate.
- If you're in a high-cost labor market, nudge the per-square-foot number toward the top of the range.
- For a final sanity check, look at the AsphaPro example: a 20x20 poured concrete patio runs about $2,400 to $4,800 installed; concrete pavers $3,200 to $7,200; natural stone $6,000 to $12,000.
When you get contractor quotes, ask them to break out line items rather than giving you a single number. A good quote should show excavation and grading, base material (type and depth), concrete or paver materials, labor for pour or installation, finishing or sealing, and any permits. If a quote is just one number with no breakdown, ask for the detail. This makes it much easier to compare bids fairly and spot where someone is cutting corners (usually on base prep) or padding (usually on material quantities).
Deck vs. patio: the budget reality check
If you're weighing a patio against a deck, the cost difference is substantial in most cases. A pressure-treated ground-level deck typically runs $25 to $50 per square foot installed, compared to $6 to $13 for a basic concrete patio. Deck vs. patio: the budget reality check. Decks are usually more expensive than patios because they require more structure and specialty labor, so comparing square-foot costs can quickly show how much more you may spend pressure-treated ground-level deck. A 12x12 concrete patio might cost you $865 to $1,870. The same size pressure-treated deck could run $3,600 to $7,200. That's a difference of $1,700 to $5,000 or more for the same square footage.
Decks cost more because of the substructure: footings, posts, beams, joists, ledger board attachment to the house, and railings if the deck is elevated. If you're comparing a patio deck to a concrete or paver patio, the framing and substructure costs are often the biggest driver of the total cost to build a patio deck. A ground-level patio avoids almost all of that.
The trade-off is that decks work on slopes and raised foundations where a patio would require significant fill or grading. If your yard is flat or gently sloped, a patio almost always wins on pure budget. If your back door is 4 feet above grade, a patio gets complicated and a deck starts making more economic sense.
It's also worth noting that composite or hardwood decks can push past $60 to $80 per square foot, which makes even a flagstone patio look affordable by comparison. If budget is the primary driver and your yard is reasonably flat, a patio is the clear winner.
Pulling it all together: the cheapest patio for most homeowners
On a flat, accessible site with decent soil, a plain broom-finished concrete slab is the cheapest permanent patio you can build. It's faster to install than pavers, more durable than gravel, and significantly cheaper than flagstone, brick, or stamped concrete. Angi’s 2026 cost data also shows installed flagstone patio totals ranging from [about $750 to $8,400](https://www. ingi.
com/articles/flagstone-patio-cost. htm/), with pricing varying by square footage and whether mortar or concrete setting is needed versus dry-laid installation. For a 12x12 patio, budget $865 to $1,870 installed. For a 20x20, budget $2,400 to $5,200.
If you want to go even cheaper and don't need a hard surface, a gravel or decomposed granite patio can come in under $1,000 for a small area, especially DIY. If you’re still comparing deck options, knowing typical deck pricing per square foot can help you choose between a deck and a patio confidently.
If you have a difficult site, high local labor costs, or want a DIY project, pavers become more competitive because you can do the installation yourself while still getting a durable, attractive result. Just don't cut corners on the base.
Your next steps to lock in the best price
- Measure your patio area and run a quick estimate using the per-square-foot ranges above before you call anyone.
- Assess your site honestly: note any slope, drainage issues, soil problems, or access constraints that will add cost.
- Get at least three quotes from local contractors and ask each one for a line-item breakdown, not a single total.
- Compare base prep specs across bids. If one quote is much lower, check whether they're skimping on gravel base depth or compaction.
- If you're comfortable doing physical work, price out a DIY paver installation. Material-only pavers at $4 to $6 per square foot can make a big difference on a 150 to 200 square foot project.
- If budget is the top priority and your yard is flat, start with concrete quotes before looking at pavers or stone.
- If you're also considering a deck, ask yourself whether your yard actually needs the elevation. If it doesn't, a patio will almost always cost less.
FAQ
Is plain broom-finished concrete still the cheapest if my yard has poor drainage or soft soil?
If you’re choosing between “cheapest” and “least likely to cause trouble,” the cheapest concrete option only stays cheapest when you can pour on stable, well-drained soil. If your yard has clay, standing water, or roots, the contractor may require thicker slab and extra reinforcement, which can push you closer to paver pricing.
What parts of a patio bid most often hide cost changes that make the “cheapest” patio more expensive?
For most homeowners, the budget risk is base prep, not the surface material. The lowest-cost quote usually assumes average site conditions, so ask for base depth (gravel thickness), slope away from the house, and what they use for compaction. If those details are missing, the “cheapest patio” number may not include what you actually need.
When is a gravel or decomposed granite patio the cheapest choice, and when does it stop being practical?
Gravel and decomposed granite can be the lowest-cost options for a small area, but they can be awkward if you need to roll out a grill, move furniture often, or want a true seamless walking surface. A practical compromise is using gravel/DG for the outer edge while keeping a concrete or paver pad for high-traffic zones like the grill landing.
If I’m trying to build the cheapest patio myself, is DIY concrete or DIY pavers the better bet?
If you plan to do it yourself, pavers are the most forgiving low-cost DIY in the article because you can control errors by correcting base and leveling before setting units. Concrete DIY is harder because finishing, curing, and control joints must be timed correctly, and mistakes can become visible defects even if the slab “holds.”
What common mistakes cause patios to shift, crack, or develop water issues even when the surface material is low-cost?
Many “cheap” patios fail early because of edge problems. For pavers, insist on edge restraints on all sides, not just around the perimeter you can easily reach, and verify the jointing sand type (polymeric for paver joints). For concrete, ask how they’ll form and finish control joints and where those joints will land.
How does limited access (tight gate, slope, or no concrete truck access) change what’s the cheapest patio to build?
If you have to work around a tight driveway, gate, or slopes that limit truck access, you may need smaller equipment deliveries or additional grading. That typically increases labor more than it increases material, which can shrink the gap between concrete and pavers. In that situation, a smaller footprint or relocating the patio to a more accessible zone often reduces total cost.
What exact line items should I ask contractors to include so I can compare the real cheapest patio option?
A basic patio price should reflect more than just “materials plus labor.” Ask whether your quote includes excavation, disposal, formwork (for concrete), reinforcement specifics (mesh versus rebar), curing/finishing, and any permit requirements. If you don’t get line items for base prep and slope/drainage, you can’t accurately compare quotes.
Which cheapest patio type is easiest to maintain or upgrade later: concrete, pavers, or gravel/DG?
If you want a low-cost upgrade path, broom-finished concrete is easiest to maintain and can be improved later with a stain or sealer, without tearing out the base. Gravel and DG can be topped up, but they don’t give the same “upgrade” feel for furniture and grills because the surface will always be loose.
What’s the most budget-friendly way to size and lay out a patio if I want the cheapest overall cost?
If your budget is tight but you still want a “real patio,” the cheapest strategy is usually to reduce the patio area, keep the layout simple, and place the durable surface only where you use it most. Adding complicated geometry or multiple transitions (raised steps, curved borders, lots of cutting) raises labor and can eliminate the cost advantage of the cheapest material.
How should I compare patio vs deck costs if I want the cheapest outdoor upgrade for my yard?
For comparing decks to patios on a tight budget, don’t just compare square-foot price. Decks often require footings, framing, and railings, and they can need additional work if elevated. If your yard is flat enough for a patio, a ground-level patio usually avoids those structural costs and stays cheaper.
Next Articles

Cheapest Way to Do a Patio: Costs, DIY vs Pros
Compare patio materials and DIY vs pros, with per-sq-ft costs for concrete, pavers, stone, brick, flagstone
How Much Should I Expect to Pay for a Patio
Patio cost guide with real price ranges by size and material, full line-item budget, DIY vs install, and quote checklist
How Much Patio Around Pool: Cost, Size, and Budget Guide
Learn how much patio around a pool costs and how to size square feet, materials, extras, and get real bid line items.